Instrukcja obsługi Metra 99-8267
Metra Niesklasyfikowane 99-8267
Przeczytaj poniżej 📖 instrukcję obsługi w języku polskim dla Metra 99-8267 (4 stron) w kategorii Niesklasyfikowane. Ta instrukcja była pomocna dla 12 osób i została oceniona przez 7 użytkowników na średnio 4.3 gwiazdek
Strona 1/4
CAUTION!
All accessories, switches, climate
controls panels, and especially air bag indicator
lights must be connected before cycling the
ignition. Also, do not remove the factory radio
with the key in the on position, or while the
vehicle is running.
Metra. The World’s Best Kits.
MetraOnline.com © COPYRIGHT 2018 METRA ELECTRONICS CORPORATION REV. 2/13/18 INST99-8267
INSTALLATION INSTRUCTIONS
99-8267
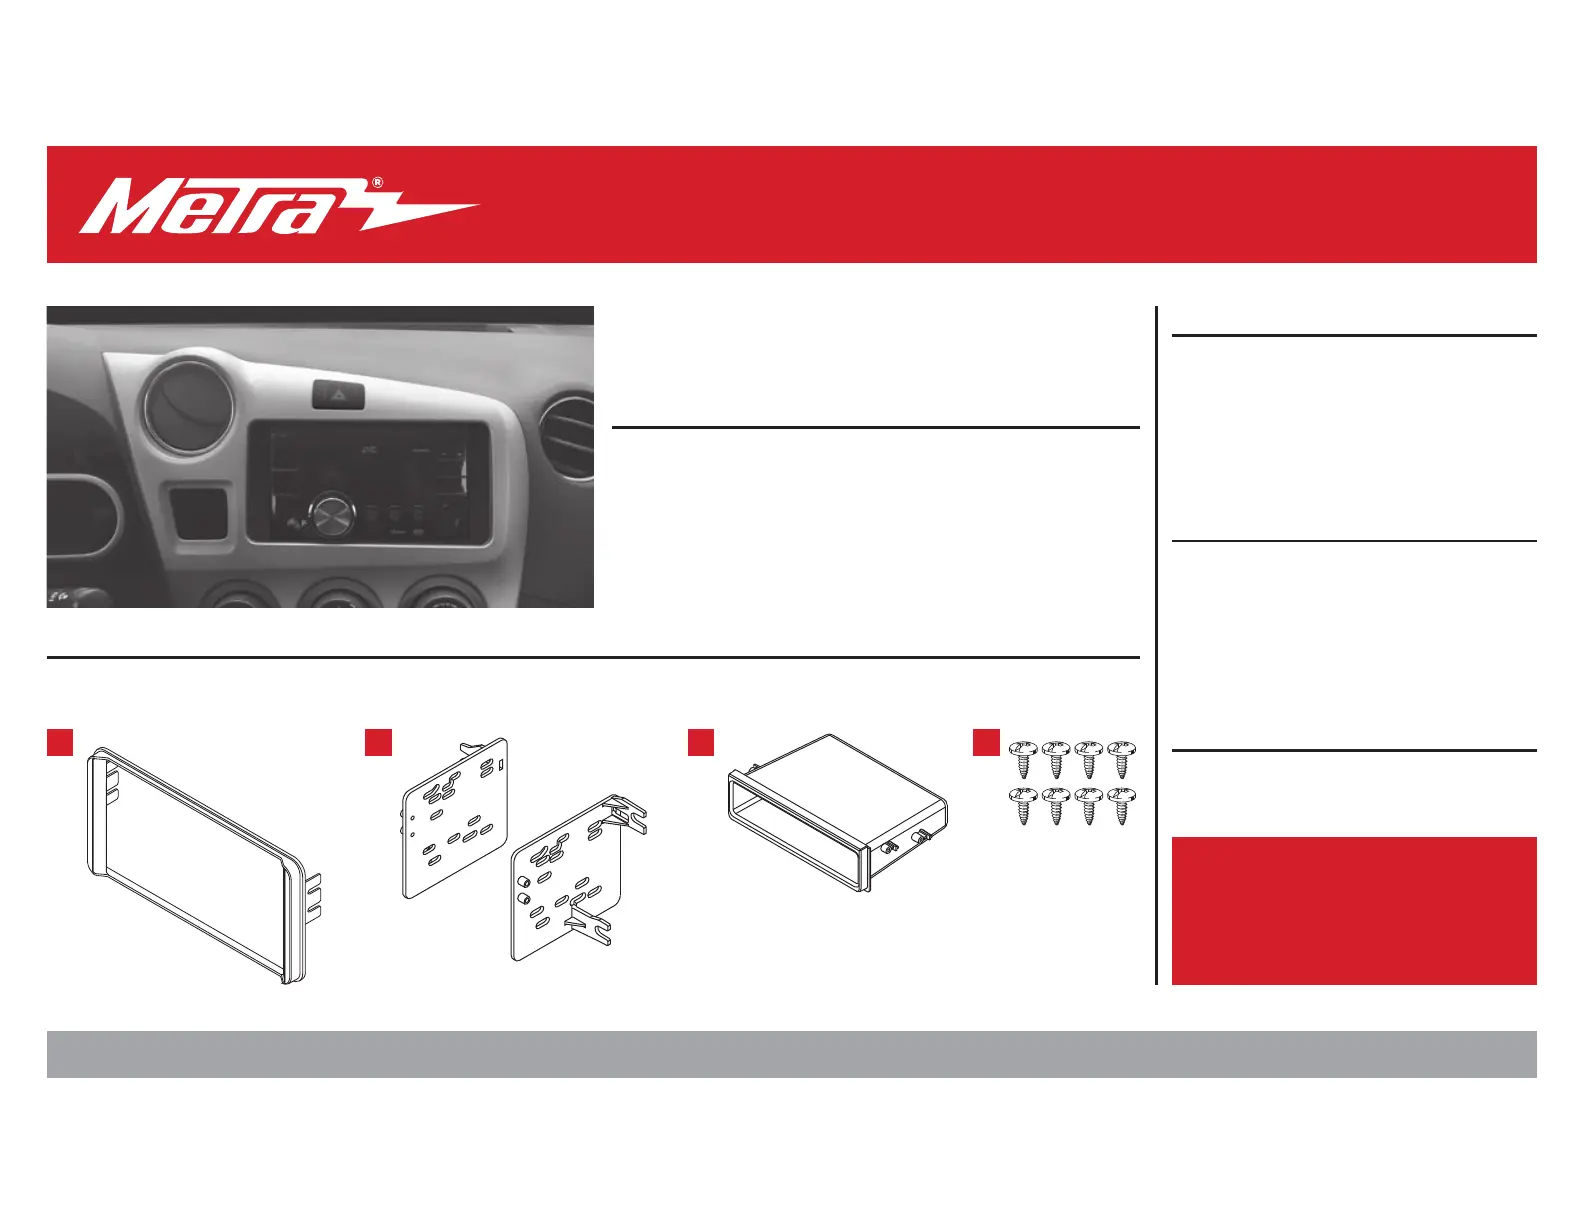
KIT FEATURES
• ISO DIN radio provision with pocket
• ISO DDIN radio provision
KIT COMPONENTS
• A) Radio trim panel • B) Radio brackets • C) Pocket • D) (8) #8 x 3/8” Phillips screws
TOOLS REQUIRED
• Panel removal tool • Phillips screwdriver
• 10mm Socket wrench
TABLE OF CONTENTS
Dash Disassembly ..................................................2
Kit Assembly
–ISO DIN radio provision with pocket ..................3
–ISO DDIN radio provision .....................................3
WIRING & ANTENNA CONNECTIONS
(sold separately)
Wiring Harness: 70-1761
Antenna Adapter: L Trim: Not required
S Trim: 40-LX11
Steering Wheel Control Interface: ASWC-1
ABC
Toyota Matrix 2013
D
Specyfikacje produktu
| Marka: | Metra |
| Kategoria: | Niesklasyfikowane |
| Model: | 99-8267 |
Potrzebujesz pomocy?
Jeśli potrzebujesz pomocy z Metra 99-8267, zadaj pytanie poniżej, a inni użytkownicy Ci odpowiedzą
Instrukcje Niesklasyfikowane Metra

13 Stycznia 2025
13 Stycznia 2025
1 Stycznia 2025
1 Stycznia 2025
11 Grudnia 2024
9 Października 2024
9 Października 2024
9 Października 2024
9 Października 2024
9 Października 2024
Instrukcje Niesklasyfikowane
Najnowsze instrukcje dla Niesklasyfikowane
29 Stycznia 2025
29 Stycznia 2025
29 Stycznia 2025
29 Stycznia 2025
29 Stycznia 2025
29 Stycznia 2025
29 Stycznia 2025
29 Stycznia 2025
29 Stycznia 2025
29 Stycznia 2025