Instrukcja obsługi Onkyo IRK1553D
Onkyo Niesklasyfikowane IRK1553D
Przeczytaj poniżej 📖 instrukcję obsługi w języku polskim dla Onkyo IRK1553D (3 stron) w kategorii Niesklasyfikowane. Ta instrukcja była pomocna dla 14 osób i została oceniona przez 7 użytkowników na średnio 4.1 gwiazdek
Strona 1/3
- 1 -- 4 -
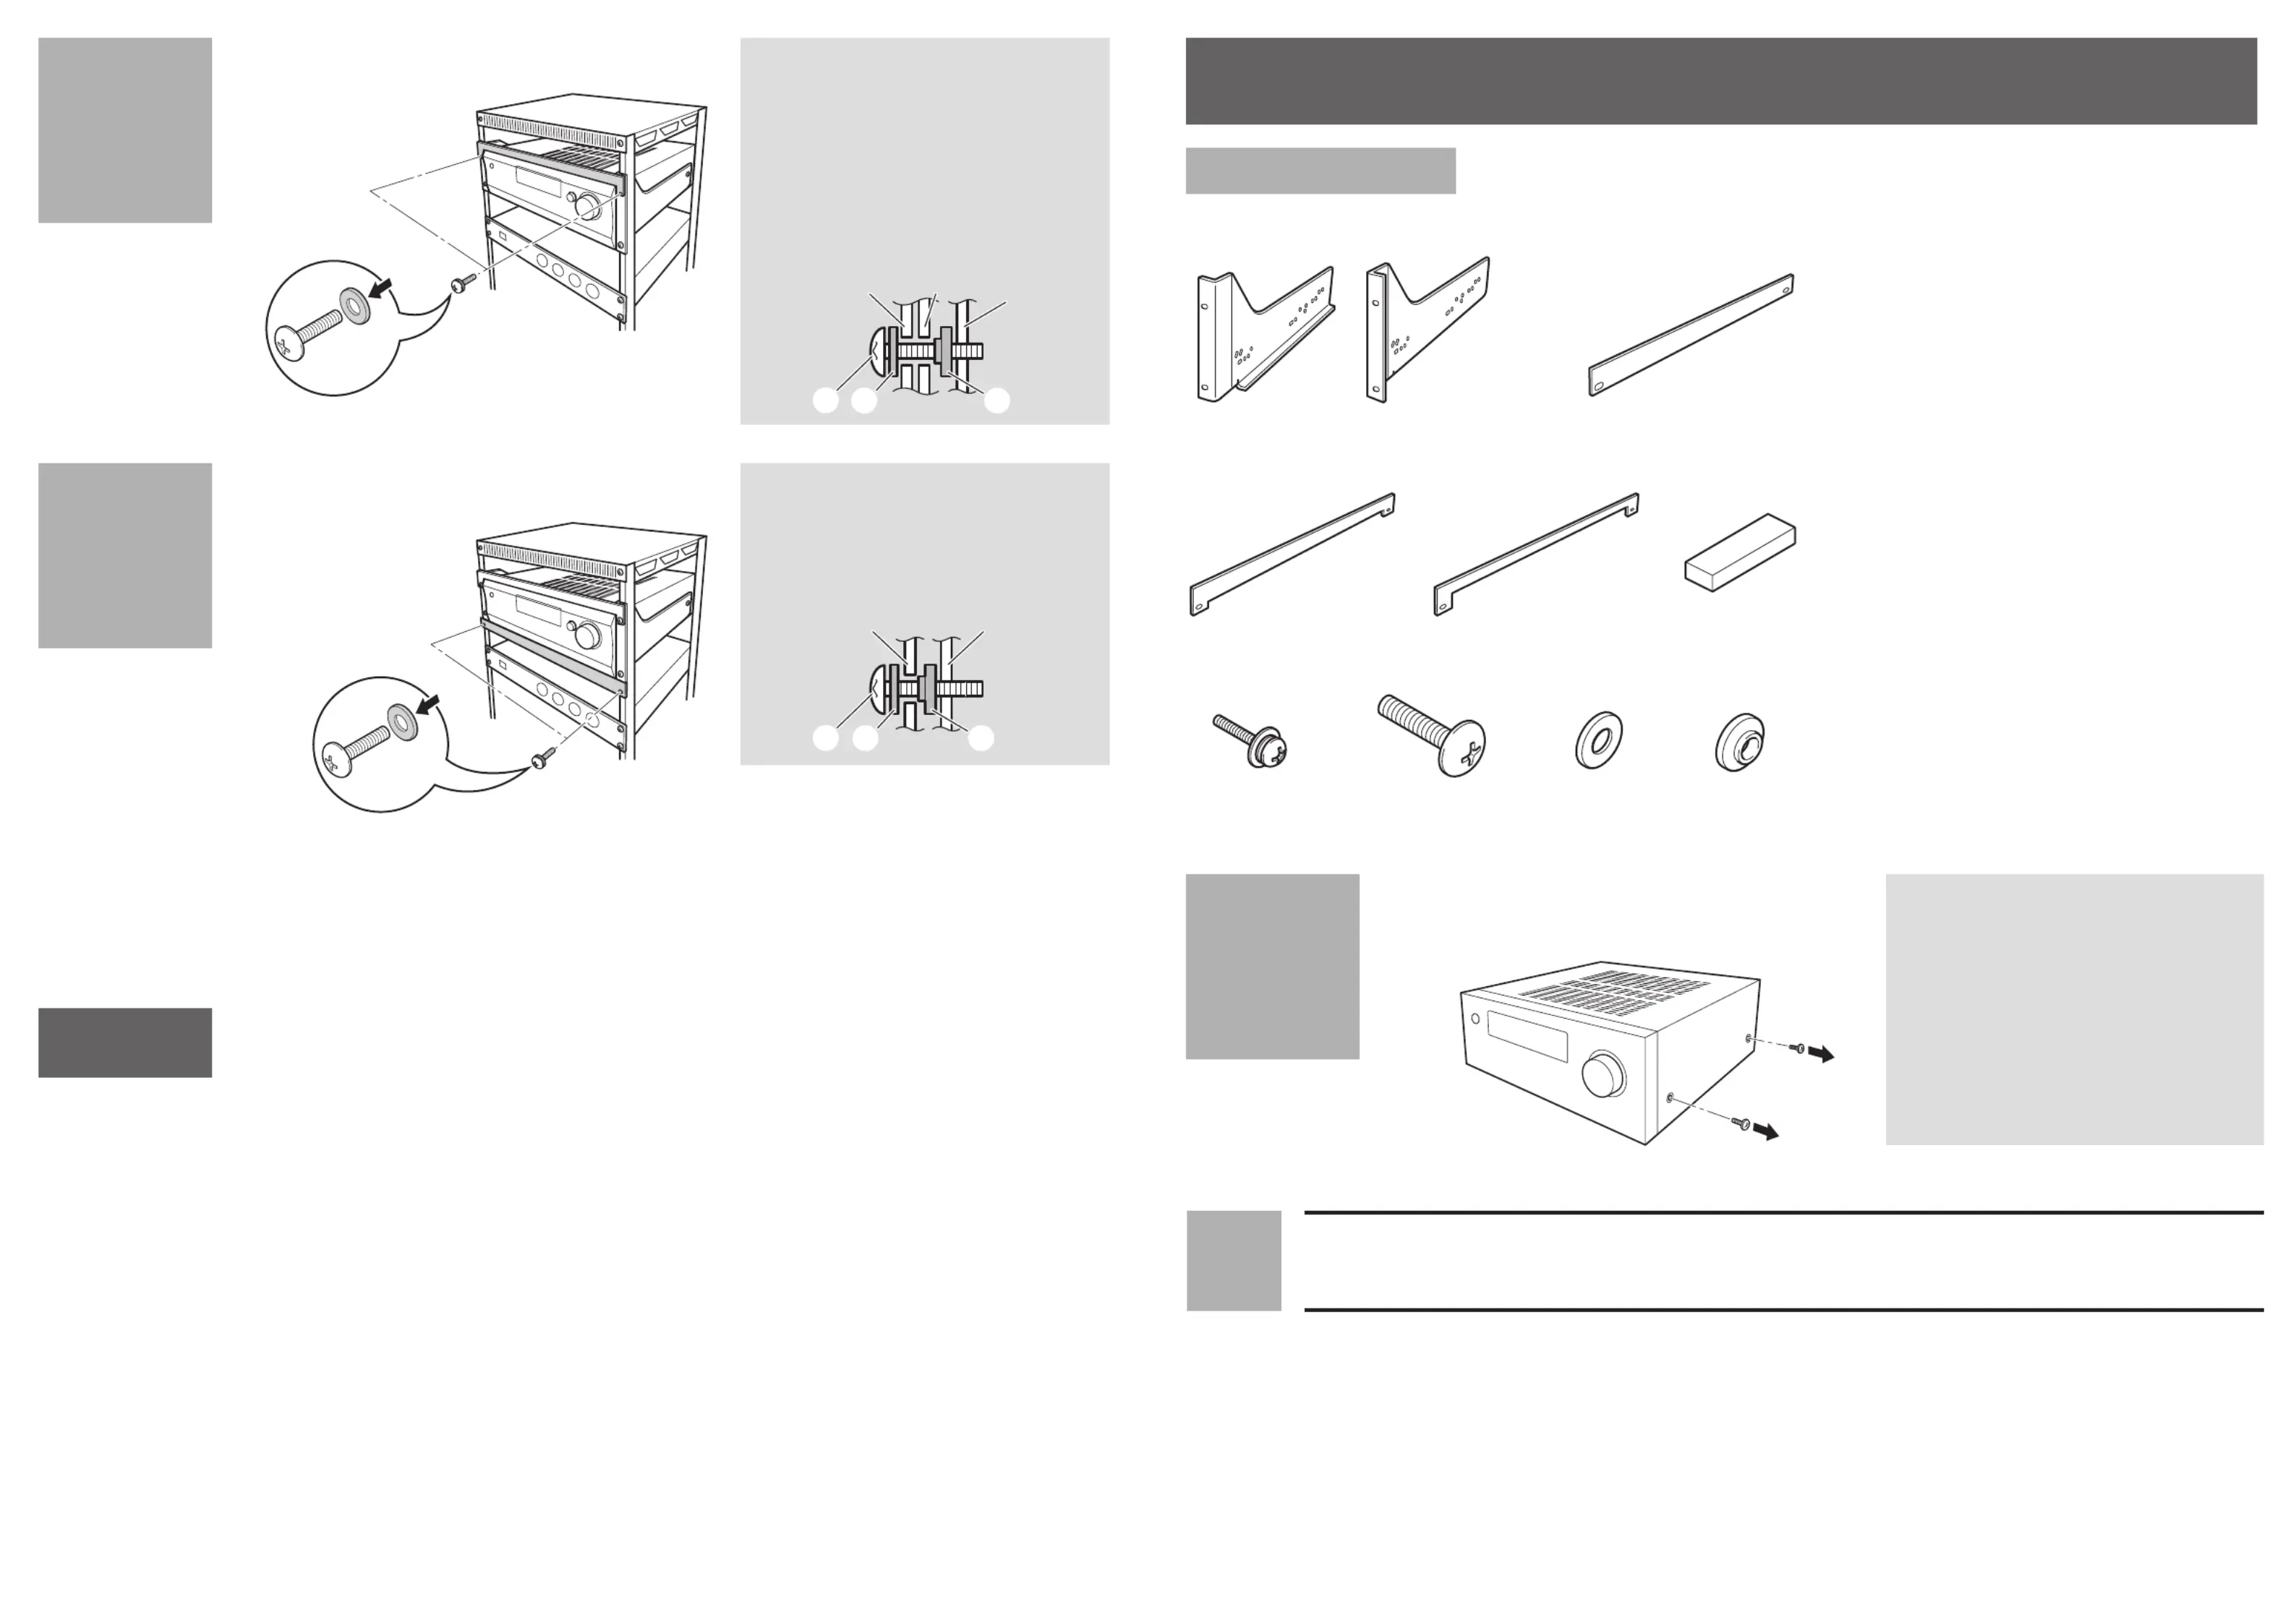
Rack Mount Kit Instruction Manual
PARTS ENCLOSED
1. Rack Mount Panels
・
Actual panels may vary by model.
2. Blank panel A
3.
Blank panel B (For 120 mm (4.7") height model)
4.
Blank panel (For 130 mm (5.1") height model)B
5. Spacer (For 130 mm (5.1") height model)
6. Screws A
・
For attaching the Rack Mount Panles to the
Unit (STEP 2).
7. Screws B
8. Washers A
9. Washers B
×
1×
1
× 1
× 4× 6× 6× 6
×
1×
4
L
R
Remove screws from the right side
of the cover.
Do not remove feet from the
unit. Remove side screws only
from cover as indicated.
STEP
1
CAUTIONS
* Not suitable For In-Wall Mounting.
* Do not ground through the rack mount.
* Do not mount the unit to the rack alone, need one more person to hold the unit.
* Read "Important Safety Instruction" in the instruction manual and install the audio product with caution to avoid blocking its
ventilation.
Improper installation may cause a re or injury.
1. Ensure that there is adequate ventilation above and below the unit.
(according to the unit's instruction manual.)
2. For products that have vents on the side panels, please do not obstruct, in order to allow for ventilation.
3. Do not cover the ventilation holes on the unit installed.
4. For products that generate heat, such as an Amplier or Receiver, please use a minimum of one "U" (1.75") blank panel (or
space) above and below product for ventilation.
For best performance, it is recommended that DVD/CD players should be rack mounted below receivers to protect laser
mechanisms.
5. If rack is installed in a warm or enclose environment, use a cooling fan for ventilation.
* Please use caution when rack mounting products. To balance the weight and to keep the center of gravity as low as possible (in
order to keep from being too top heavy) mount heavier products towards the bottom of the rack.
SN29356000F1803-0
STEP
STEP
4
5
Mount the blank panel B.
Mount the blank panel A.
or
More than one person is
needed for this step.
Please ensure that tack screw
and washers are assembled
as shown below to avoid
grounding through the rack
mount and blank panel B.
Please ensure that tack screw
and washers are assembled
as shown below to avoid
grounding through the blank
panel A.
Rack Mount
Panel
Blank
Panel B
Rack
Blank Panel ARack
Please mount
panel with
sticker on back
side, oriented
as indicated on
sticker.
If the height of the unit being mounted is 155 mm (6.1") (
â
P2)
If the height of the unit being mounted is 120 mm (4.7") or 130 mm (5.1") (
â
P3 - 4)
STEP
2
Specyfikacje produktu
| Marka: | Onkyo |
| Kategoria: | Niesklasyfikowane |
| Model: | IRK1553D |
Potrzebujesz pomocy?
Jeśli potrzebujesz pomocy z Onkyo IRK1553D, zadaj pytanie poniżej, a inni użytkownicy Ci odpowiedzą
Instrukcje Niesklasyfikowane Onkyo

24 Grudnia 2024
24 Grudnia 2024
26 Sierpnia 2024
26 Sierpnia 2024
13 Sierpnia 2024
4 Lipca 2024
Instrukcje Niesklasyfikowane
Najnowsze instrukcje dla Niesklasyfikowane
29 Stycznia 2025
29 Stycznia 2025
29 Stycznia 2025
29 Stycznia 2025
29 Stycznia 2025
29 Stycznia 2025
29 Stycznia 2025
29 Stycznia 2025
29 Stycznia 2025
29 Stycznia 2025