Instrukcja obsługi Perel LEDC04
Przeczytaj poniżej 📖 instrukcję obsługi w języku polskim dla Perel LEDC04 (4 stron) w kategorii Ulga. Ta instrukcja była pomocna dla 21 osób i została oceniona przez 6 użytkowników na średnio 4.1 gwiazdek
Strona 1/4
+-
+-
LED DIMMER INSTALLATION INSTRUCTIONS
VARIATEUR DE LED CONSIGNES DE MONTAGE
LED-DIMMER MONTAGE INSTRUCTIES
LED-DIMMER BEDIENUNGSANLEITUNG
DIMMER LED MANUAL DEL USUARIO
DIMMER LED MANUAL DO UTILIZADOR
LED DIMMER INSTALLATIONS INSTRUKTIONER
LEDC04
EN
To all residents of the European Union
Important environmental information about this product
This symbol on the device or the package indicates that disposal
of the device after its lifecycle could harm the environment. Do not
dispose of the unit (or batteries) as unsorted municipal waste; it should
be taken to a specialized company for recycling. This device should be
returned to your distributor or to a local recycling service. Respect the
local environmental rules.
If in doubt, contact your local waste disposal authorities.
Thank you for choosing Vellight! Please read the manual thoroughly
before bringing this device into service. If the device was damaged in
transit, don’t install or use it and contact your dealer.
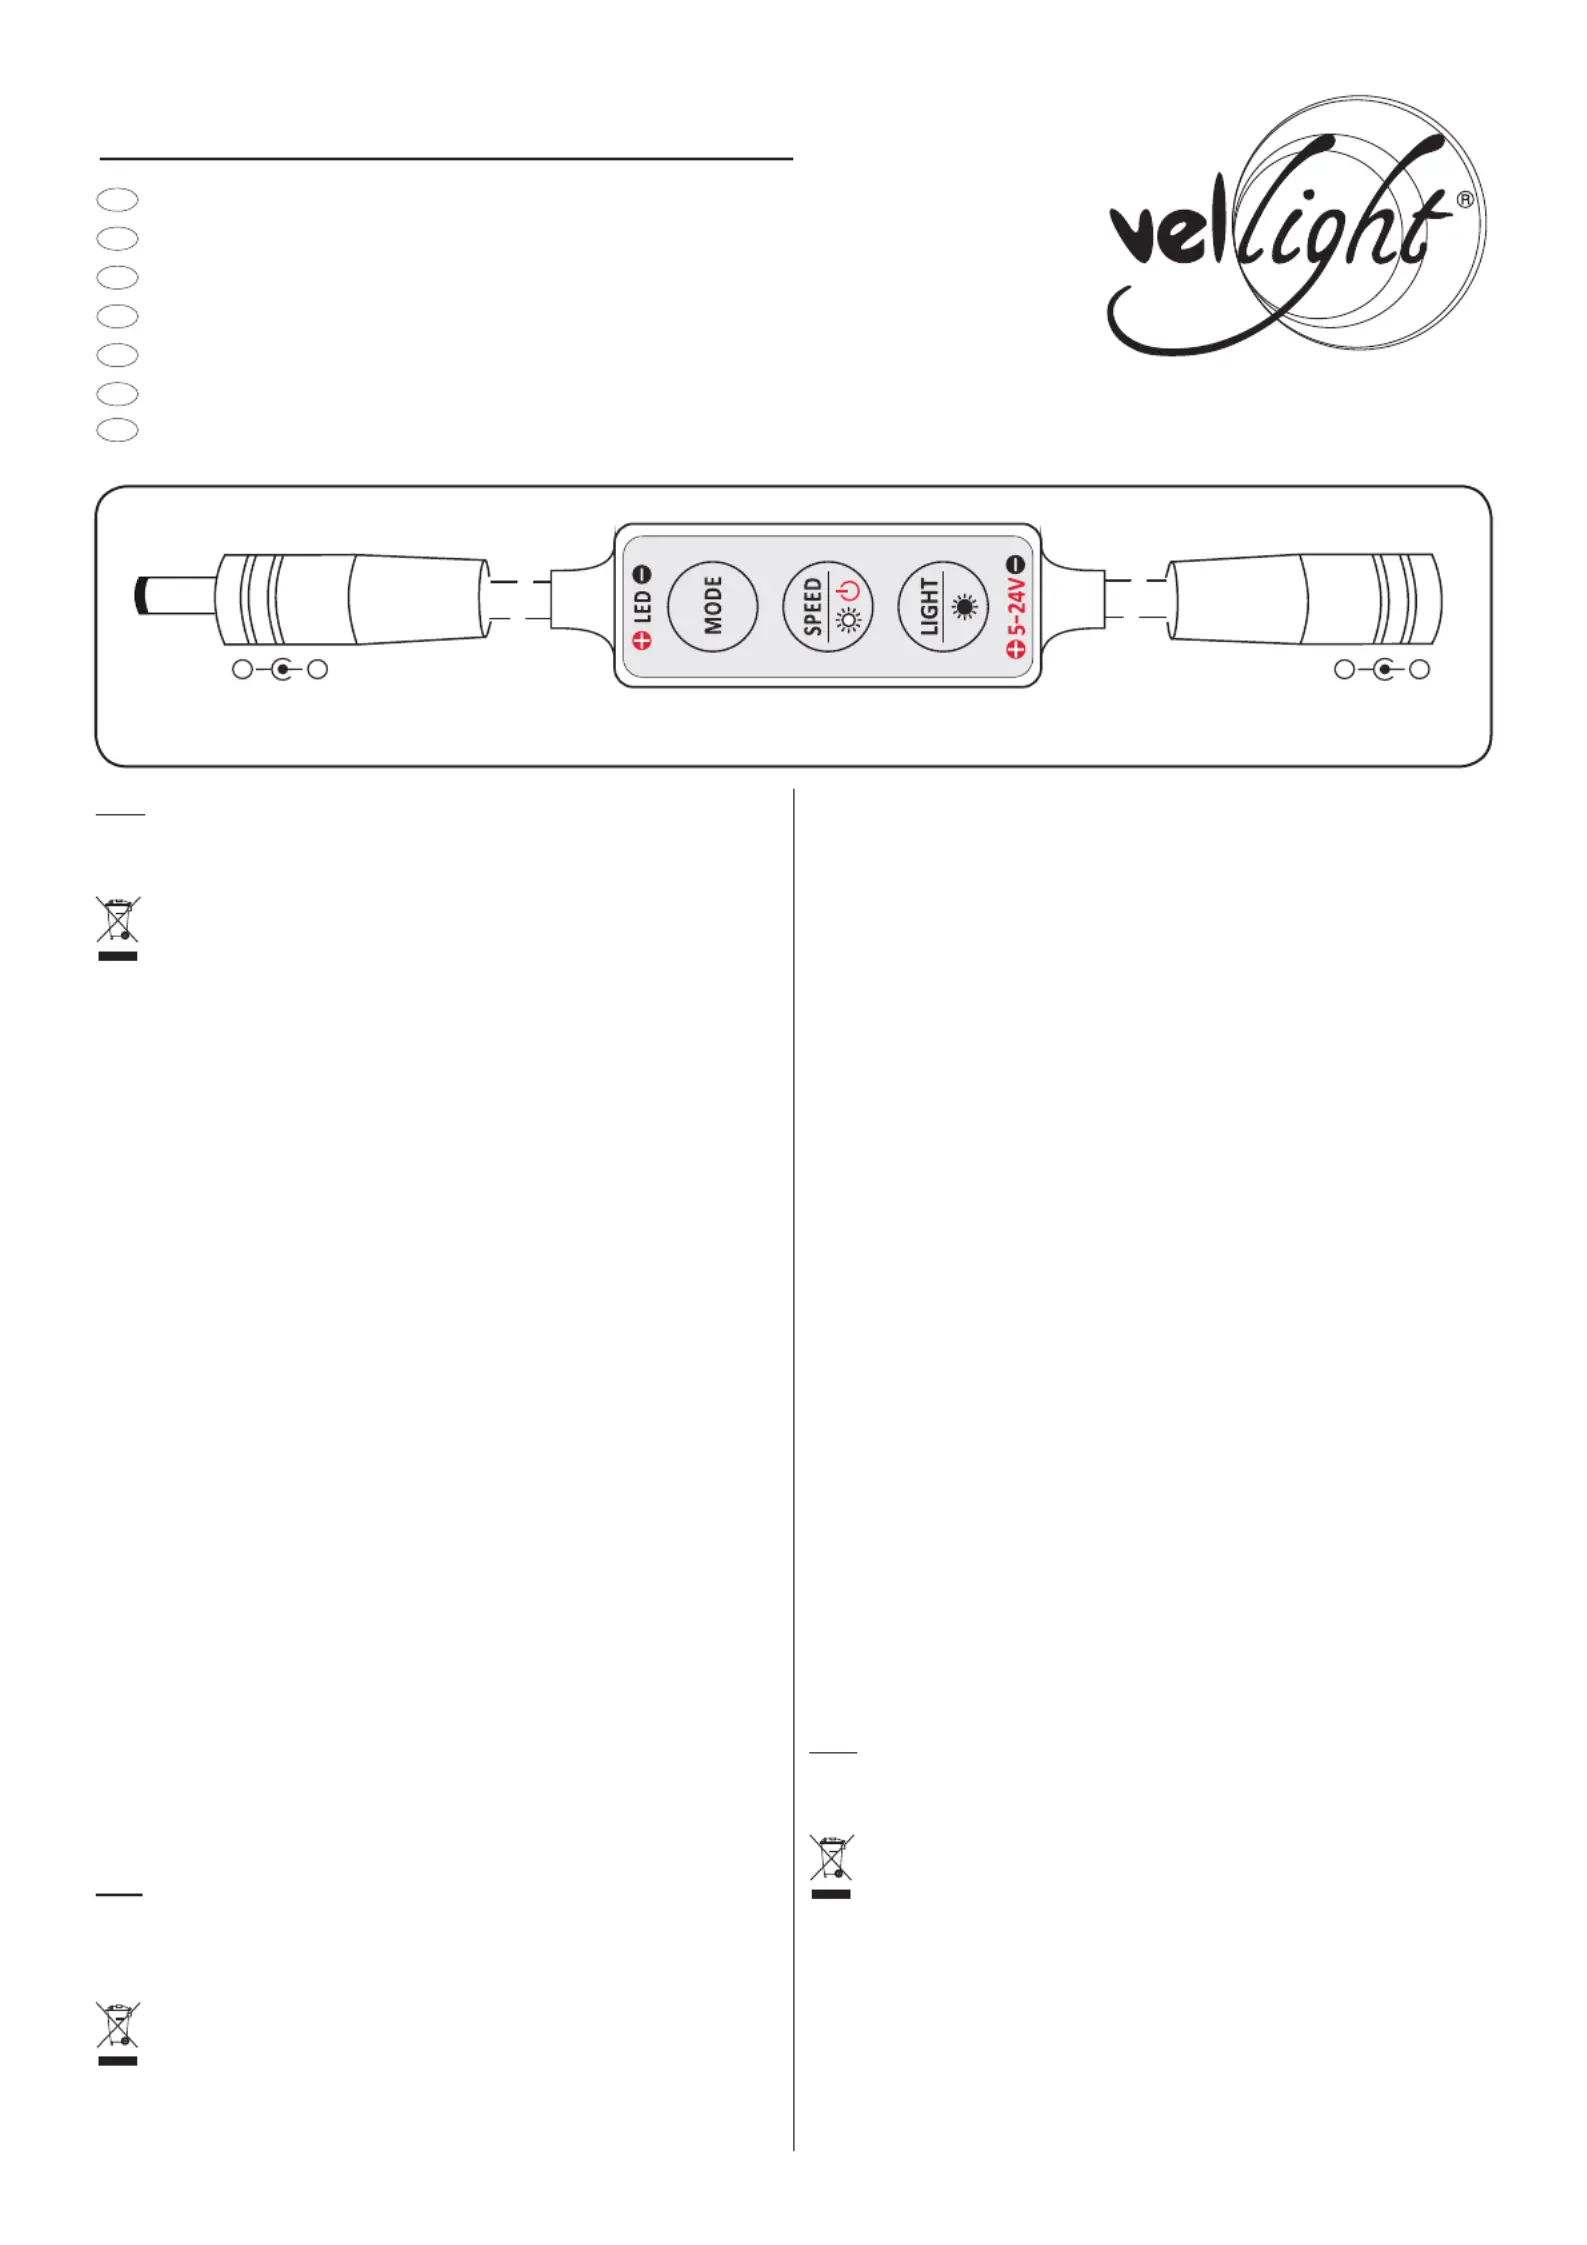
Installation:
1. Connect the cable end marked “LED” to the LED strip.
2. Connect the cable end marked “5-24V” to a suitable DC power
supply.
The DC power voltage must be equal to the rated voltage of the LED
strip.
3. Press any key to switch on.
Operation:
1. MODE key: switch to automatic mode.
Press repeatedly to choose an automatic program.
2. SPEED/Brightness/Off key: adjust speed or brightness.
In automatic mode, press to change speed.
In static colour mode, press to change brightness.
Press and hold for 1 second to switch off.
In off mode, press any key to switch on and start the last selected
mode.
3. LIGHT/Brightness key: switch to static colour mode.
In static colour mode, press to change brightness.
Press and hold for 1 second to jump to maximum brightness.
FR
Aux résidents de l’Union européenne
Des informations environnementales importantes concernant ce
produit
Ce symbole sur l’appareil ou l’emballage indique que l’élimination
d’un appareil en n de vie peut polluer l’environnement. Ne pas jeter un
appareil électrique ou électronique (et des piles éventuelles) parmi les
déchets municipaux non sujets au tri sélectif ; une déchèterie traitera
l’appareil en question. Renvoyer les équipements usagés à votre
fournisseur ou à un service de recyclage local. Il convient de respecter
la réglementation locale relative à la protection de l’environnement.
En cas de questions, contacter les autorités locales pour élimination.
Nous vous remercions de votre achat ! Lire la présente notice
attentivement avant la mise en service de l’appareil. Si l’appareil a été
endommagé pendant le transport, ne pas l’installer et consulter votre
revendeur.
Installation:
1. Connecter l’extrémité du câble marquée avec “LED” à la barrette
LED.
2. Connecter l’extrémité du câble marquée avec “5-24V” à une source
d’alimentation CC appropriée.
3. La tension CC doit être égale à la tension nominale de la barrette
LED.
4. Appuyer sur un bouton quelconque pour allumer.
Fonctionnement:
1. Bouton MODE: basculer en mode automatique.
Appuyer plusieurs fois pour choisir un programme automatique.
2. Bouton SPEED/Brightness/Off: ajuster la vitesse ou la luminosité.
En mode automatique, appuyer pour ajuster la vitesse.
En mode de couleur statique, appuyer pour ajuster la luminosité.
Maintenir enfoncé pendant 1 seconde pour éteindre.
En mode off, appuyer sur un bouton quelconque pour allumer et pour
lancer le dernier mode sélectionné.
3. Bouton LIGHT/Brightness: basculer en mode de couleur statique.
En mode de couleur statique, appuyer pour ajuster la luminosité.
Maintenir enfoncé pendant 1 seconde pour accéder directement à la
luminosité maximale.
NL
Aan alle ingezetenen van de Europese Unie
Belangrijke milieu-informatie betreffende dit product
Dit symbool op het toestel of de verpakking geeft aan dat, als
het na zijn levenscyclus wordt weggeworpen, dit toestel schade kan
toebrengen aan het milieu. Gooi dit toestel (en eventuele batterijen) niet
bij het gewone huishoudelijke afval; het moet bij een gespecialiseerd
bedrijf terechtkomen voor recyclage. U moet dit toestel naar uw verdeler
of naar een lokaal recyclagepunt brengen. Respecteer de plaatselijke
milieuwetgeving.
Hebt u vragen, contacteer dan de plaatselijke autoriteiten betreffend de
verwijdering.
Dank u voor uw aankoop! Lees deze handleiding grondig voor u het
EN
FR
NL
DE
ES
SE
PT
Specyfikacje produktu
| Marka: | Perel |
| Kategoria: | Ulga |
| Model: | LEDC04 |
Potrzebujesz pomocy?
Jeśli potrzebujesz pomocy z Perel LEDC04, zadaj pytanie poniżej, a inni użytkownicy Ci odpowiedzą
Instrukcje Ulga Perel

8 Lutego 2025
14 Grudnia 2024
14 Grudnia 2024
14 Grudnia 2024
14 Grudnia 2024
14 Grudnia 2024
14 Grudnia 2024
14 Grudnia 2024
14 Grudnia 2024
14 Grudnia 2024
Instrukcje Ulga
Najnowsze instrukcje dla Ulga
9 Kwietnia 2025
8 Kwietnia 2025
8 Kwietnia 2025
8 Kwietnia 2025
8 Kwietnia 2025
7 Kwietnia 2025
5 Kwietnia 2025
5 Kwietnia 2025
5 Kwietnia 2025
5 Kwietnia 2025