Instrukcja obsługi SereneLife SLSBIN10
SereneLife Niesklasyfikowane SLSBIN10
Przeczytaj poniżej 📖 instrukcję obsługi w języku polskim dla SereneLife SLSBIN10 (2 stron) w kategorii Niesklasyfikowane. Ta instrukcja była pomocna dla 21 osób i została oceniona przez 6 użytkowników na średnio 4.8 gwiazdek
Strona 1/2
www.SereneLifeHome.com
Register Product
Thank you for choosing SereneLife.
By registering your product, you ensure that
you receive the full benets of our exclusive
warranty and personalized customer
support. Complete the form to access expert
support and to keep your SereneLife
purchase in perfect condition.
Serenelifehome.com/
register
WARNING:Cancer and Reproductive Harm- www.P65warnings.ca.gov
Locking Storage Container Bin
Visit Our Website
SCAN ME
serenelifehome.com
USER GUIDE
FEATURES:
•
Convenient Storage Box Solution
• Integrated Combination Lock for Security
• User-Dened Number Pass Code Setting
• Safe, Rugged, Reliable Construction
• Heavy-Duty Impact Resistance
• Anti-Scratch & Stain-Resistant Housing
• Easy Access Lift-Top Hinges
• Clean & Streamline Modern Style
• Side Panel Carry Handle Grips
• Perfect for Home, Oce, School, Business & Mobile Use
TECHNICAL SPECS:
•
Internal Storage Capacity: 8 Gallon/32 Liter
• Maximum Support Weight: 66+ lbs.
• Construction Material: Reinforced Engineered ABS
• Pass Code Type: Manual 4-Digit, Numerical
• Internal Dimensions: 17.52'' x 10.43'' x 8.46''
• Product Dimensions: 18.11'' x 11.2'' x 9.65''
CLEANING, MAINTENANCE, AND STORAGE
Cleaning
•Wipe with a damp cloth.Exterior:
• Clean and dry thoroughly.Interior:
• Dust with a dry cloth.Lock:
Maintenance: Check screws and hinges regularly.
Storage
• Keep in a cool, dry place.
• Don’t overload.
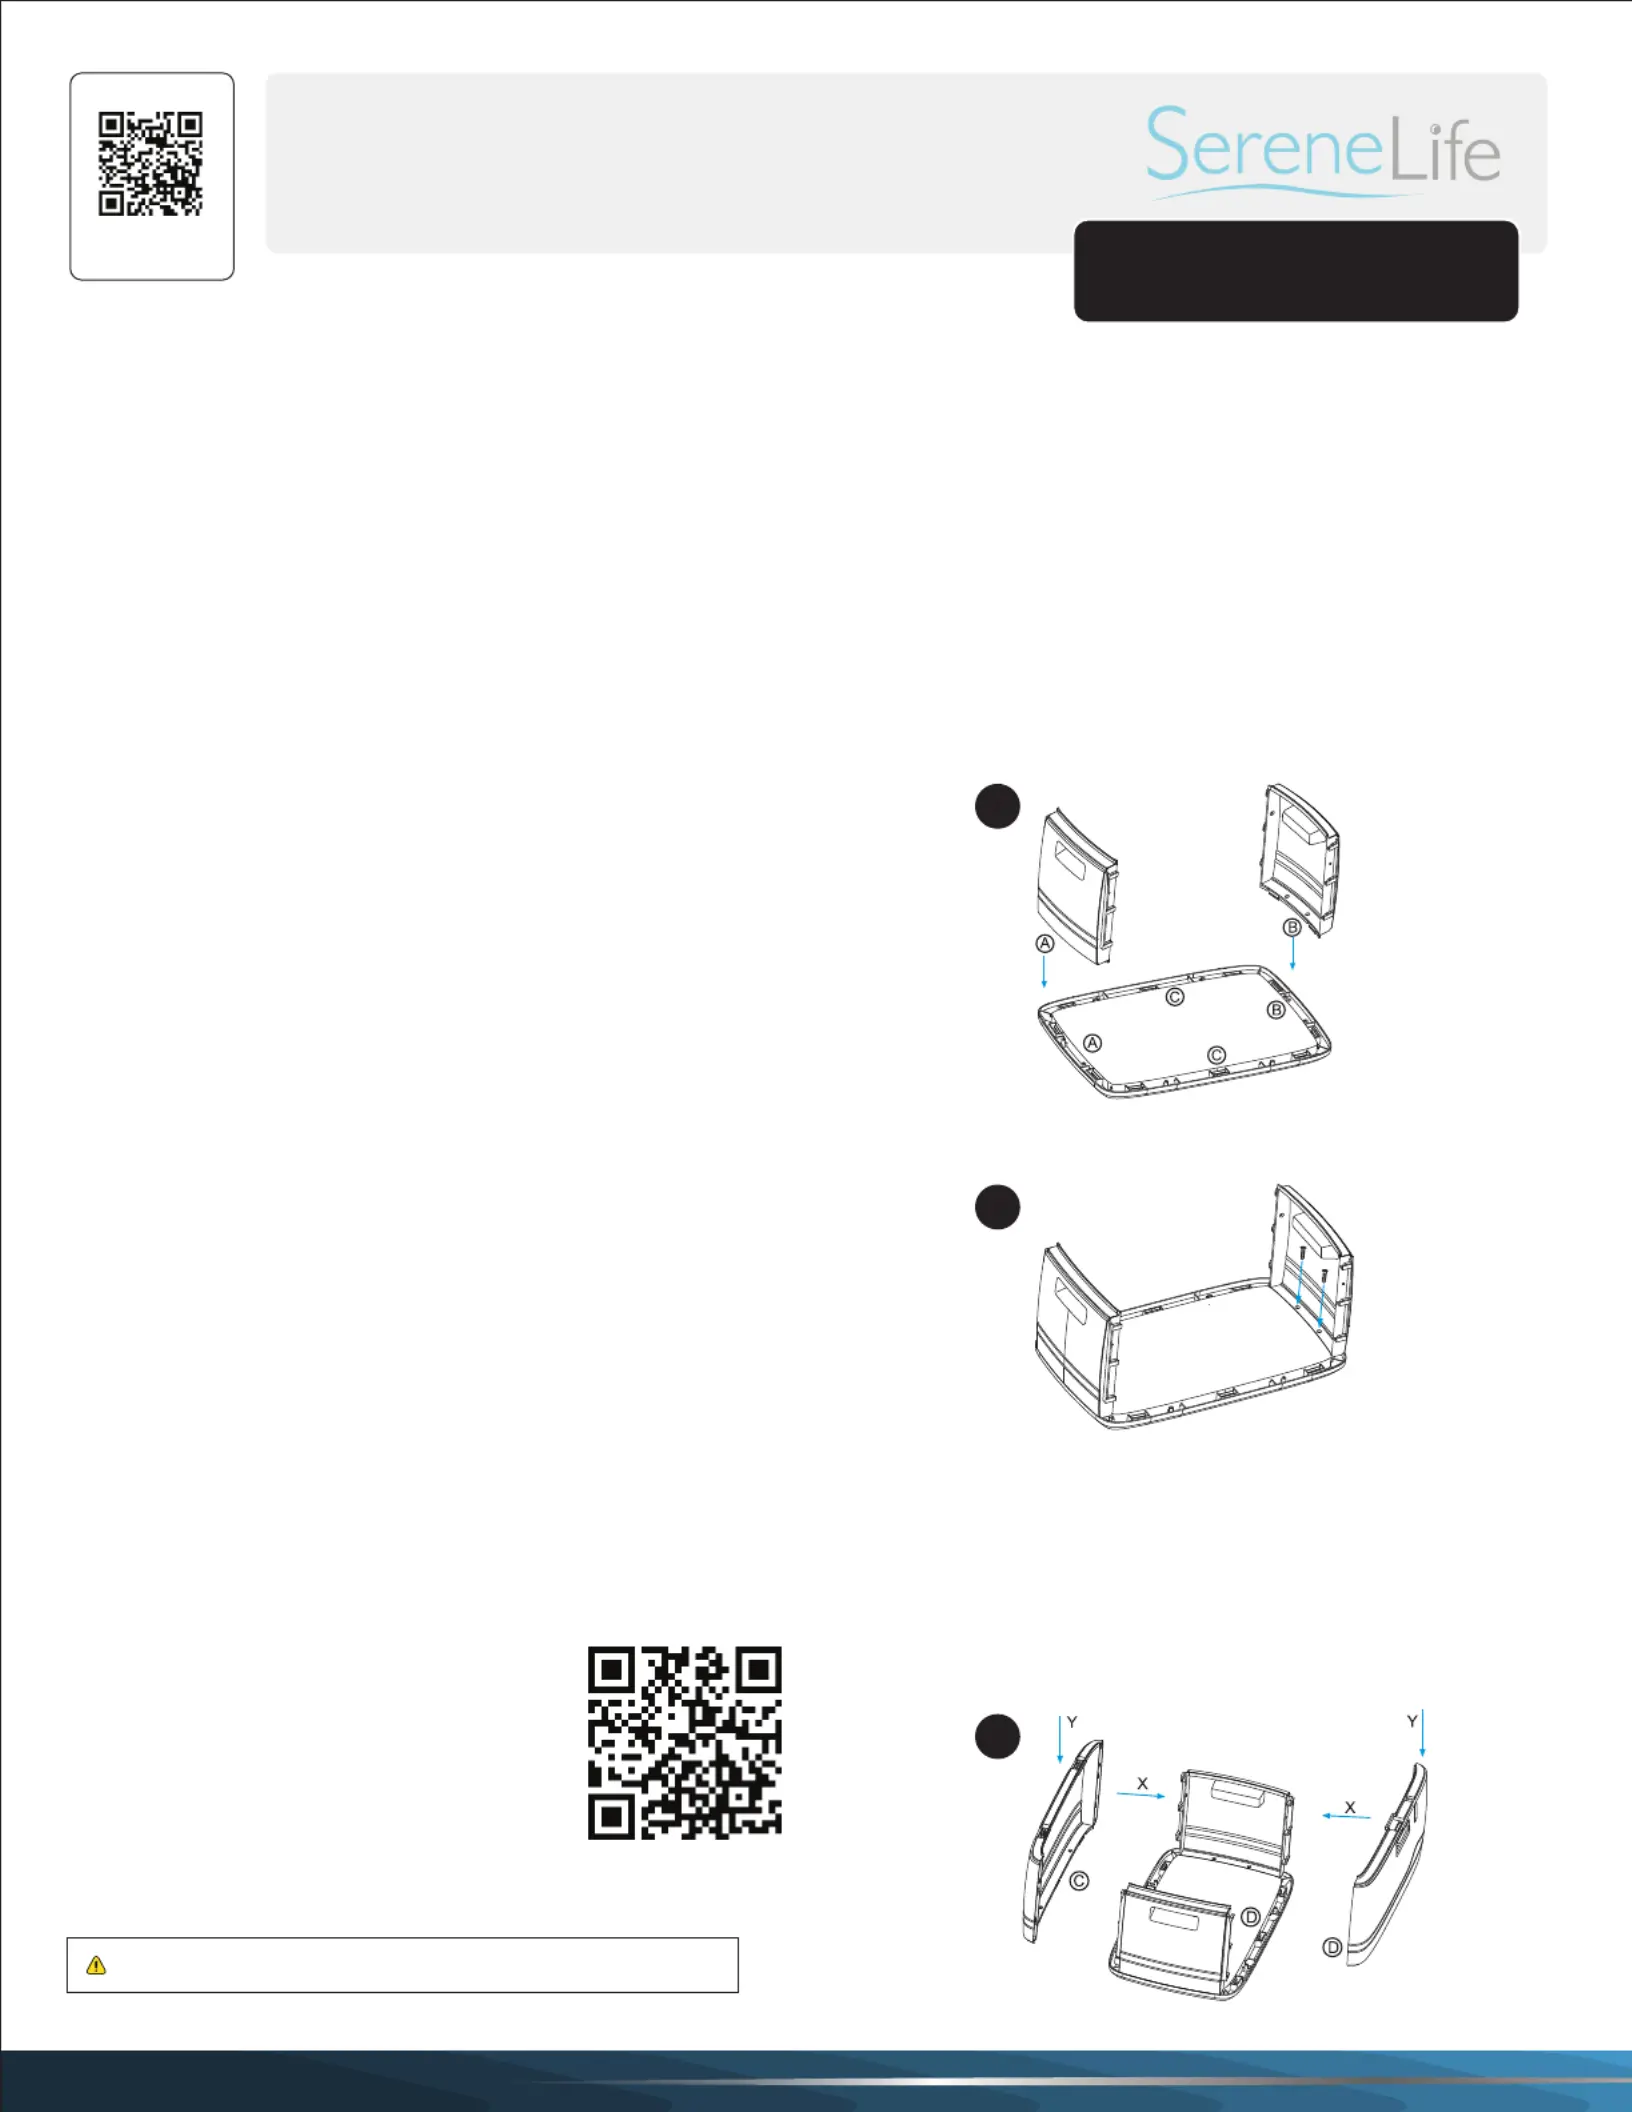
ASSEMBLY INSTRUCTIONS & LAYOUT
Please Note:
Be sure to check the letters marked on the sides of the bin
and align as shown in the images for proper orientation.
Refer to the images on the corresponding page.
1. Lay the bottom of the bin down and start by adding
the side plates.
•You will feel the plastic latch engage when the sides
are rmly pressed into place.
2. Add 3 screws on each side to secure the side plates.
3. Now add the front and back plates.
• First, align the front and back plates with the side plates
in the "" direction, and push down to latch onto the Y
base.
•Then push in to secure the latches in the "" direction, X
latching to the side plates.
SLSBIN10
1
2
3
Specyfikacje produktu
| Marka: | SereneLife |
| Kategoria: | Niesklasyfikowane |
| Model: | SLSBIN10 |
Potrzebujesz pomocy?
Jeśli potrzebujesz pomocy z SereneLife SLSBIN10, zadaj pytanie poniżej, a inni użytkownicy Ci odpowiedzą
Instrukcje Niesklasyfikowane SereneLife

5 Stycznia 2025
28 Grudnia 2024
28 Grudnia 2024
9 Października 2024
9 Października 2024
9 Października 2024
9 Października 2024
9 Października 2024
25 Września 2024
25 Września 2024
Instrukcje Niesklasyfikowane
Najnowsze instrukcje dla Niesklasyfikowane
29 Stycznia 2025
29 Stycznia 2025
29 Stycznia 2025
29 Stycznia 2025
29 Stycznia 2025
29 Stycznia 2025
29 Stycznia 2025
29 Stycznia 2025
29 Stycznia 2025
29 Stycznia 2025