Instrukcja obsługi StarTech.com M2-REMOVABLE-PCIE-N1
StarTech.com Niesklasyfikowane M2-REMOVABLE-PCIE-N1
Przeczytaj poniżej 📖 instrukcję obsługi w języku polskim dla StarTech.com M2-REMOVABLE-PCIE-N1 (2 stron) w kategorii Niesklasyfikowane. Ta instrukcja była pomocna dla 16 osób i została oceniona przez 5 użytkowników na średnio 4.4 gwiazdek
Strona 1/2
Quick-Start Guide
To view manuals, FAQs, videos, drivers, downloads, technical drawings, and more, visit www.startech.com/support.
Manual Revision: May 16, 2023 4:31 PM
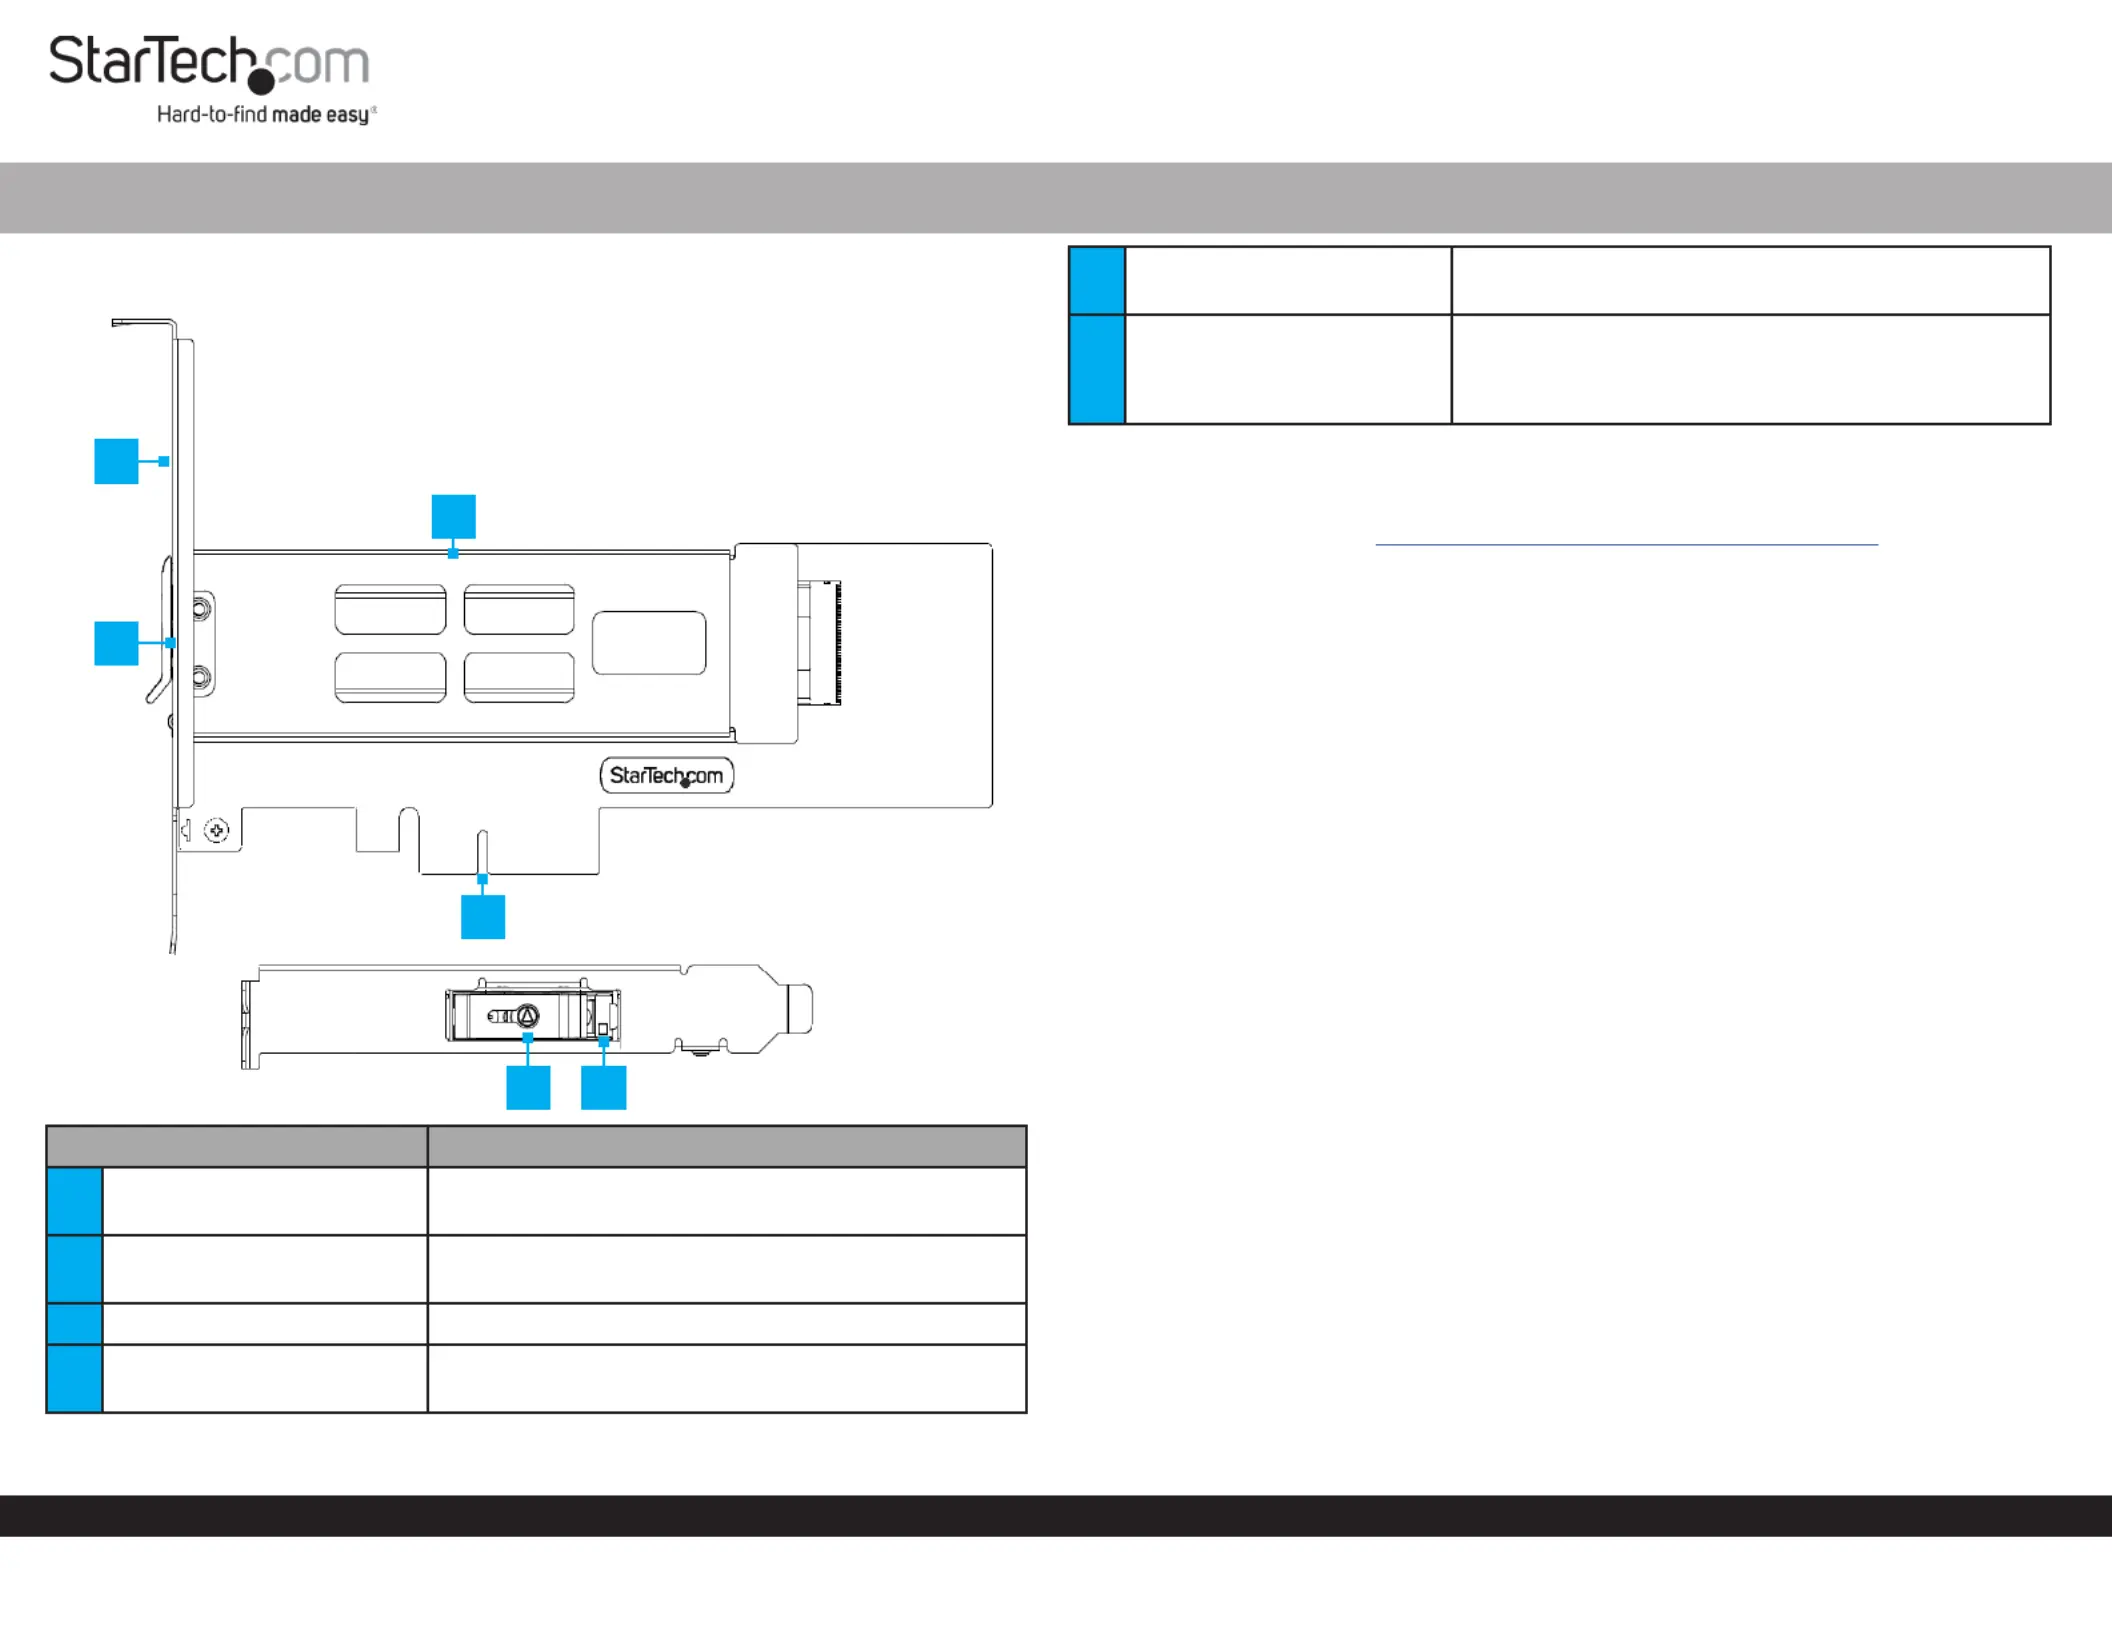
Product ID
M2-REMOVABLE-PCIE-N1
ComponentFunction
1Full-Prole Bracket
• Secure the to the M.2 to PCIe AdapterComputer
Case
2Bracket Mounting Screws
• Secure the to the Full/Low Prole BracketM.2 to
PCIe Adapter
3M.2 Drive TrayHosts the for the • M.2 DriveM.2 to PCIe Adapter
4PCIe p1-x4 Connector
• Connect the to a PCIe to M.2 to PCIe Adapter
PCIe SlotComputer in the
M.2 NVMe SSD Bay for PCIe p1-x4 Expansion Slot
5Key Lock for Drive Tray
• Use the included to Lock or Unlock the KeyM.2
Drive TrayM.2 to PCIe Adapter from the
6Drive LED Indicator
• Red: Connected Drive is Not Supported
• Green: Connected Drive is Supported
• Yellow: Flashes to indicate Drive Activity
Requirements
For the latest drivers/software, technical specications, and declarations of
conformance, please visit: www.StarTech.com/M2-REMOVABLE-PCIE-N1
Package Contents
• M.2 to PCIe Adapter x 1
• Low-Prole Bracket x 1
• M.2 Drive Tray x 1
• Quick-Start Guide x 1
Installation
Warning: PCIe Cards can be damaged by static electricity. Ensure that the Installer
is properly grounded before they open the Computer Case or touch the M.2 to PCIe
Adapter. The Installer should wear an Anti-Static Strap when installing any computer
component. If an Anti-Static Strap is not available, discharge any built-up static
electricity by touching a large Grounded Metal Surface for several seconds. Only
handle the M.2 to PCIe Adapter by its edges and do not touch the gold connectors.
(Optional) Installing the Low Prole Bracket
Note: By default the is attached to the Full Prole BracketM.2 to PCIe Adapter.
Depending on the system conguration the may need to be Full Prole Bracket
removed and replaced with the (included).Low Prole Bracket
1. Using a , remove the two securing Small Phillips Head ScrewdriverBracket Screws
the to the. Set the aside Full Prole Bracket M.2 to PCIe AdapterBracket Screws
as they will be used to attach the .Low Prole Bracket
2. Align the on the with the on the Screw Holes M.2 to PCIe AdapterScrew Holes
Low Prole Bracket ensuring the M.2 to PCIe Adapter is sitting on-top of the
Screw HolesLow Prole Bracket on the .
3. Insert the through the and into the Bracket ScrewsM.2 to PCIe Adapter Screw
HolesLow Prole Bracket on the .
4. Using the , tighten the , being Small Phillips Head ScrewdriverBracket Screws
careful not to over-tighten them.
1
2
4
5
3
6
Specyfikacje produktu
| Marka: | StarTech.com |
| Kategoria: | Niesklasyfikowane |
| Model: | M2-REMOVABLE-PCIE-N1 |
Potrzebujesz pomocy?
Jeśli potrzebujesz pomocy z StarTech.com M2-REMOVABLE-PCIE-N1, zadaj pytanie poniżej, a inni użytkownicy Ci odpowiedzą
Instrukcje Niesklasyfikowane StarTech.com

9 Stycznia 2025
9 Stycznia 2025
9 Stycznia 2025
9 Stycznia 2025
9 Stycznia 2025
8 Stycznia 2025
8 Stycznia 2025
8 Stycznia 2025
8 Stycznia 2025
8 Stycznia 2025
Instrukcje Niesklasyfikowane
Najnowsze instrukcje dla Niesklasyfikowane
29 Stycznia 2025
29 Stycznia 2025
29 Stycznia 2025
29 Stycznia 2025
29 Stycznia 2025
29 Stycznia 2025
29 Stycznia 2025
29 Stycznia 2025
29 Stycznia 2025
29 Stycznia 2025