Instrukcja obsługi StarTech.com PEXUS313AC2V
StarTech.com Niesklasyfikowane PEXUS313AC2V
Przeczytaj poniżej 📖 instrukcję obsługi w języku polskim dla StarTech.com PEXUS313AC2V (2 stron) w kategorii Niesklasyfikowane. Ta instrukcja była pomocna dla 18 osób i została oceniona przez 4 użytkowników na średnio 4.5 gwiazdek
Strona 1/2
Instruction manual
FR: Guide de l’utilisateur - fr.startech.com
DE: Bedienungsanleitung - de.startech.com
ES: Guía del usuario - es.startech.com
NL: Gebruiksaanwijzing - nl.startech.com
PT: Guia do usuário - pt.startech.com
IT: Guida per l’uso - it.startech.com
JP: - jp.startech.com取扱説明書
Manual Revision: 02/12/2018
For the latest information, technical specications, and support for
this product, please visit www.startech.com/PEXUS313AC2V.
Package contents
• 1 x controller card
• 1 x instruction manual
System requirements
• Computer with an available PCI Express slot (x4, x8, x16)
• Any of the following operating systems:
• Windows® 10 (32-bit or 64-bit)
• Windows 8 / 8.1 (32-bit or 64-bit)
• Windows 7 (32-bit or 64-bit)
• macOS 10.13
• 15-pin SATA power connector (optional)
or
• LP4 molex power connector (optional)
Operating system requirements are subject to change. For the latest
requirements, please visit www.startech.com/PEXUS313AC2V.
PEXUS313AC2V
4-Port PCI Express USB 3.1 (10Gbps) Controller Card - 3x USB-A - 1x USB-C
*actual product may vary from photos
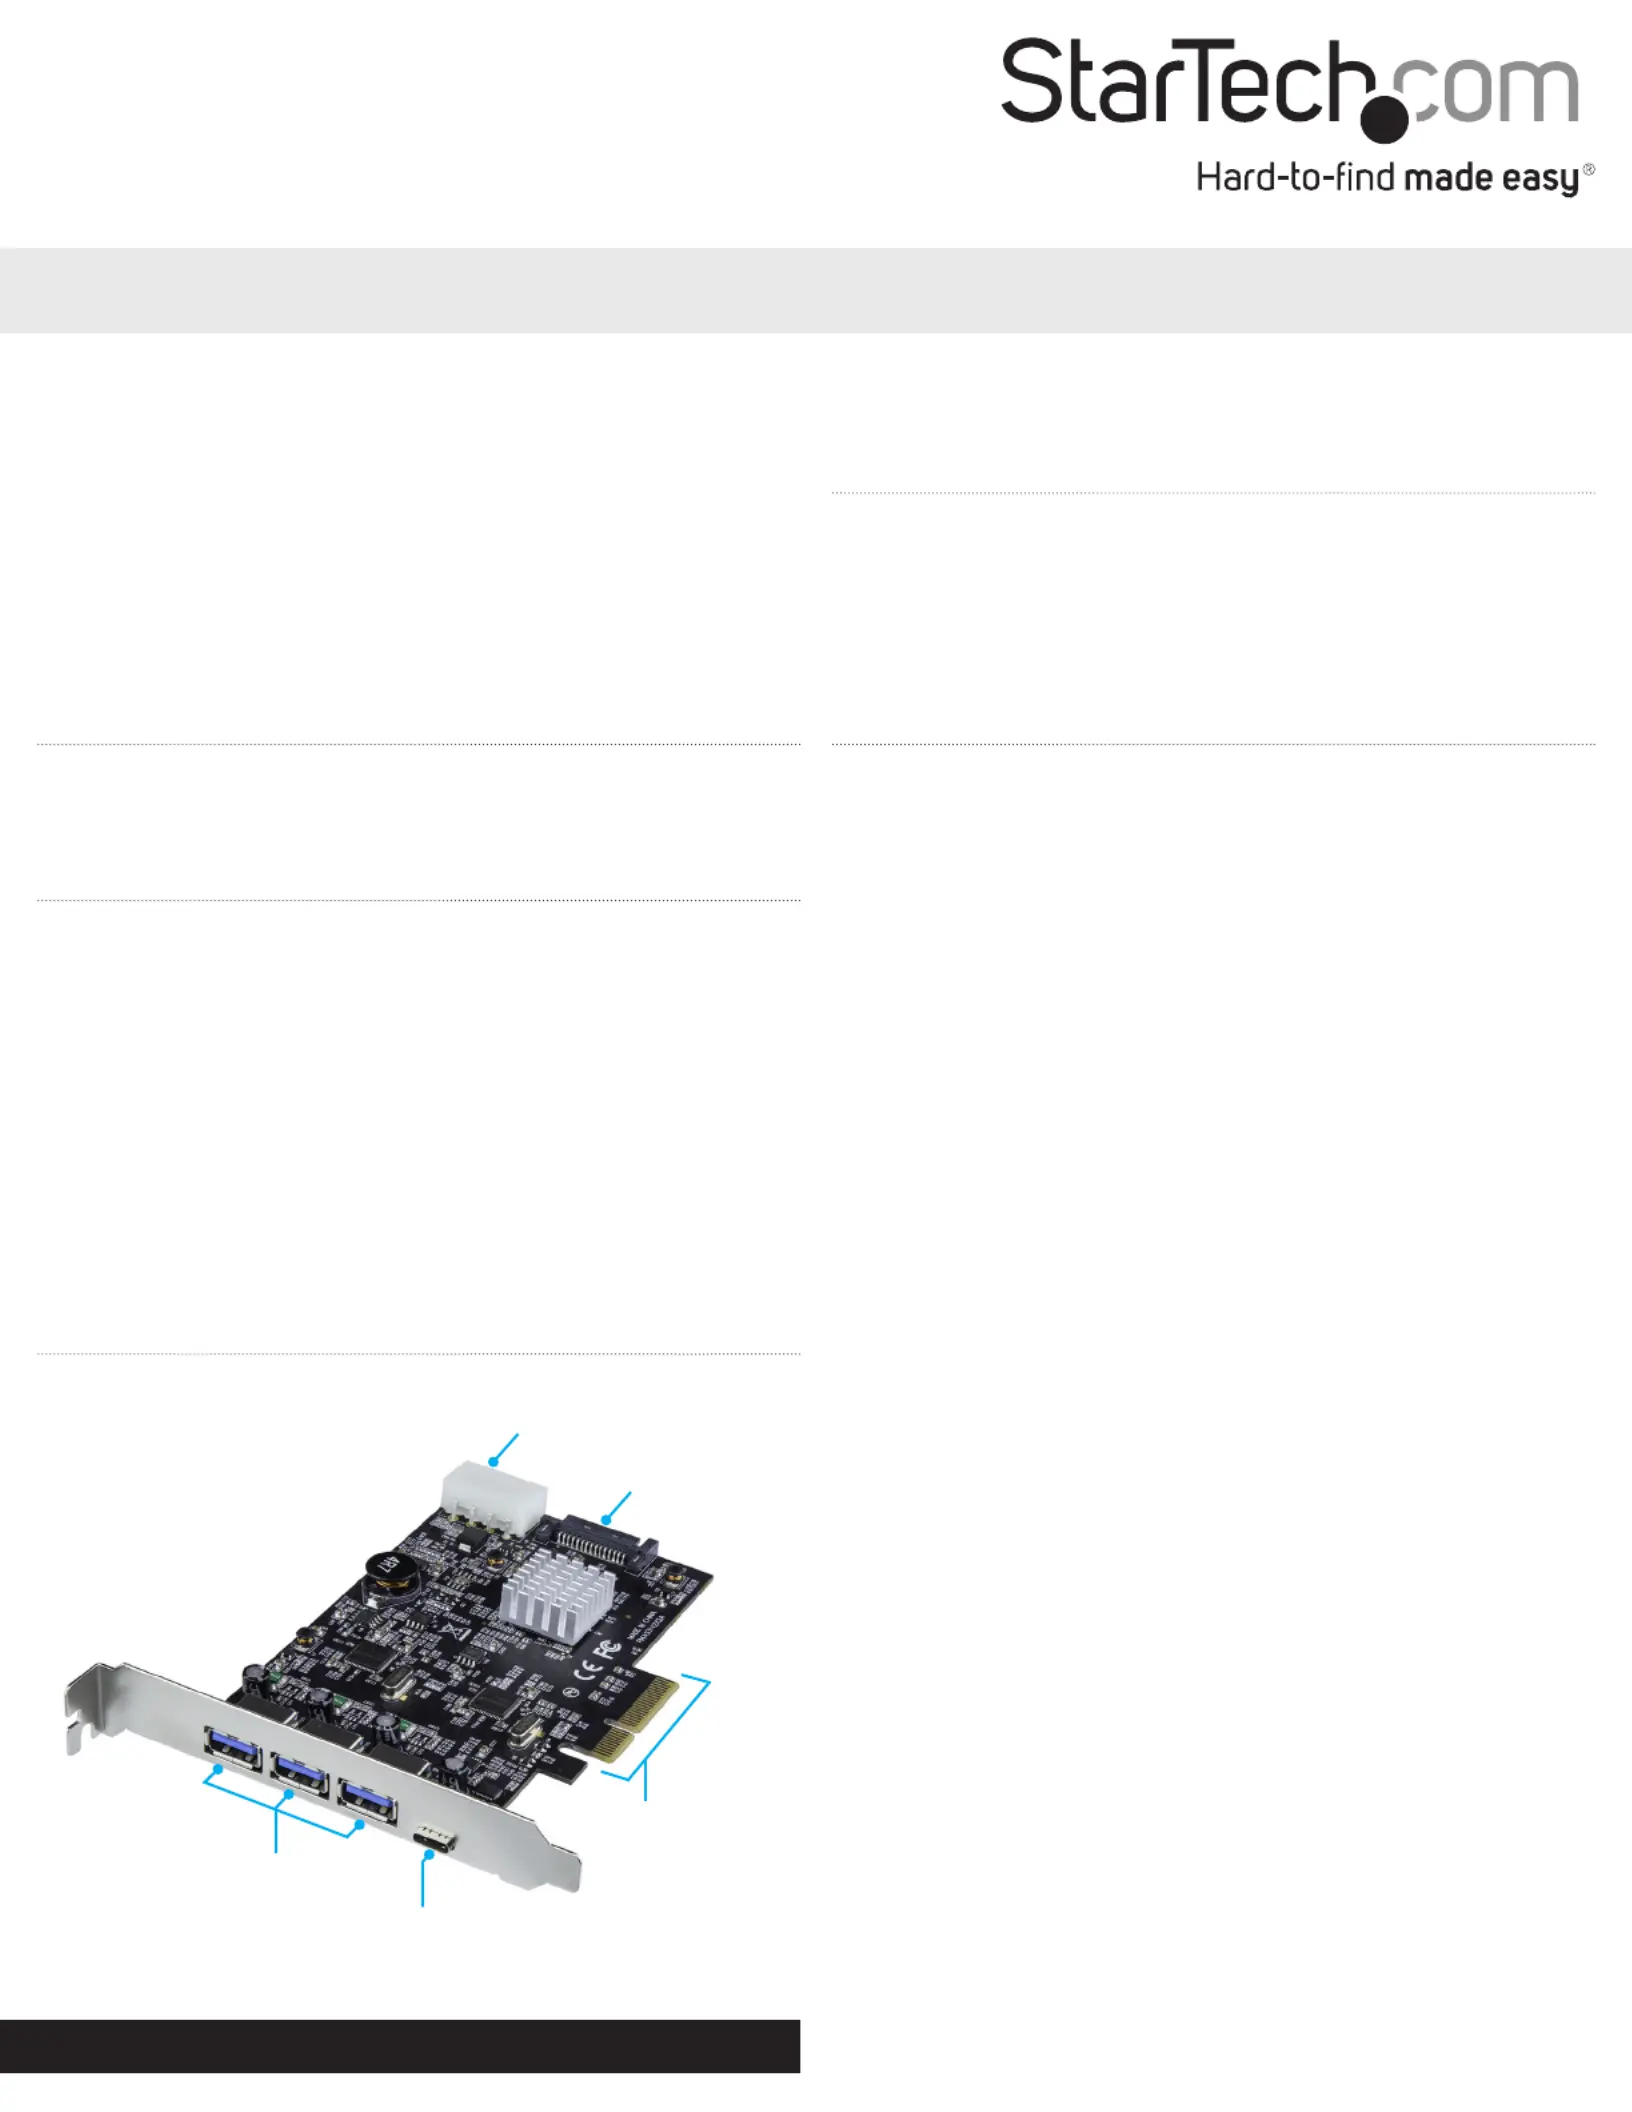
Product diagram
Installation
Install the USB 3.1 card
WARNING!
PCI Express cards can be severely damaged by static electricity. Make
sure that you’re properly grounded before you handle any and all
electronic components. You should wear an anti-static strap when you
install any computer component. If an anti-static strap isn’t available,
discharge any built-up static electricity by touching a large grounded
metal surface for several seconds. Only handle the PCI Express card by
its edges and don’t touch the gold connectors.
1. Turn o your computer and any devices or peripherals that are
connected to it (for example, printers, external hard drives, etc).
2. Unplug the power cable from the back of your computer.
3. Disconnect any peripheral devices that are connected to your
computer.
4. Remove the cover from your computer case. Consult the
documentation that came with your computer for details about
how to do this properly.
5. Locate an open PCI Express slot (x4 or higher) and remove the
corresponding metal cover plate from the back of your computer
case. Consult the documentation that came with your computer
for details about how to do this safely.
6. Gently insert the card’s PCIe connector into the open PCI Express
slot and fasten the bracket to the back of the case.
7. (Optional): Connect either a 15-pin SATA or LP4 power connector
from your computer’s power supply to the card’s SATA or LP4
power connector.
Note: it is recommended that you connect SATA or LP4 power
to ensure sucient power is provided to the card and to each
USB 3.1 port.
8. Place the cover back onto your computer case.
9. Reconnect the power cable to the back of your computer.
10. Reconnect all of the peripheral devices that you disconnected in
step 3.
11. Turn on your computer.
About USB 3.1 Gen 2
USB 3.1 Gen 2 oers speeds up to 10Gbps. The PEXUS313AC2V is a
USB 3.1 (10Gbps) Gen 2 card.
3 x USB 3.1 port
(USB-A)
USB 3.1 port
(USB-C™)
PCIe p1-x4
connector
SATA power
connector
LP4 Molex
connector
Specyfikacje produktu
| Marka: | StarTech.com |
| Kategoria: | Niesklasyfikowane |
| Model: | PEXUS313AC2V |
Potrzebujesz pomocy?
Jeśli potrzebujesz pomocy z StarTech.com PEXUS313AC2V, zadaj pytanie poniżej, a inni użytkownicy Ci odpowiedzą
Instrukcje Niesklasyfikowane StarTech.com

9 Stycznia 2025
9 Stycznia 2025
9 Stycznia 2025
9 Stycznia 2025
9 Stycznia 2025
8 Stycznia 2025
8 Stycznia 2025
8 Stycznia 2025
8 Stycznia 2025
8 Stycznia 2025
Instrukcje Niesklasyfikowane
Najnowsze instrukcje dla Niesklasyfikowane
29 Stycznia 2025
29 Stycznia 2025
29 Stycznia 2025
29 Stycznia 2025
29 Stycznia 2025
29 Stycznia 2025
29 Stycznia 2025
29 Stycznia 2025
29 Stycznia 2025
29 Stycznia 2025