Instrukcja obsługi StarTech.com S251BPU31C3
StarTech.com Niesklasyfikowane S251BPU31C3
Przeczytaj poniżej 📖 instrukcję obsługi w języku polskim dla StarTech.com S251BPU31C3 (2 stron) w kategorii Niesklasyfikowane. Ta instrukcja była pomocna dla 24 osób i została oceniona przez 7 użytkowników na średnio 4.6 gwiazdek
Strona 1/2
Quick start guide
DE: Bedienungsanleitung - de.startech.com
FR: Guide de l'utilisateur - fr.startech.com
ES: Guía del usuario - es.startech.com
IT: Guida per l'uso - it.startech.com
NL: Gebruiksaanwijzing - nl.startech.com
PT: Guia do usuário - pt.startech.com
Manual Revision: 01/25/2016
For the latest information, technical specications, and support for
this product, please visit www.startech.com/S251BPU31C3.
Packaging contents
• 1 x USB 3.1 to 2.5 in. SATA HDD enclosure
• 1 x drive cushion
• 1 x USB Type-C™ to Micro B cable
• 1 x quick start guide
System requirements
• 2.5 in. SATA HDD (hard drive) or SSD (solid-state drive) (maximum
height of 9.5 mm)
• USB-enabled computer system with an available USB Type-C port
Note:To obtain the maximum USB throughput, you must use a PC
with a USB 3.1 Gen 2 port.
System requirements are subject to change. For the latest
requirements, please visit www.startech.com/S251BPU31C3.
S251BPU31C3
USB 3.1 (10Gbps) Tool-Free Enclosure for 2.5” SATA SSD/HDD - USB-C
*actual product may vary from photos
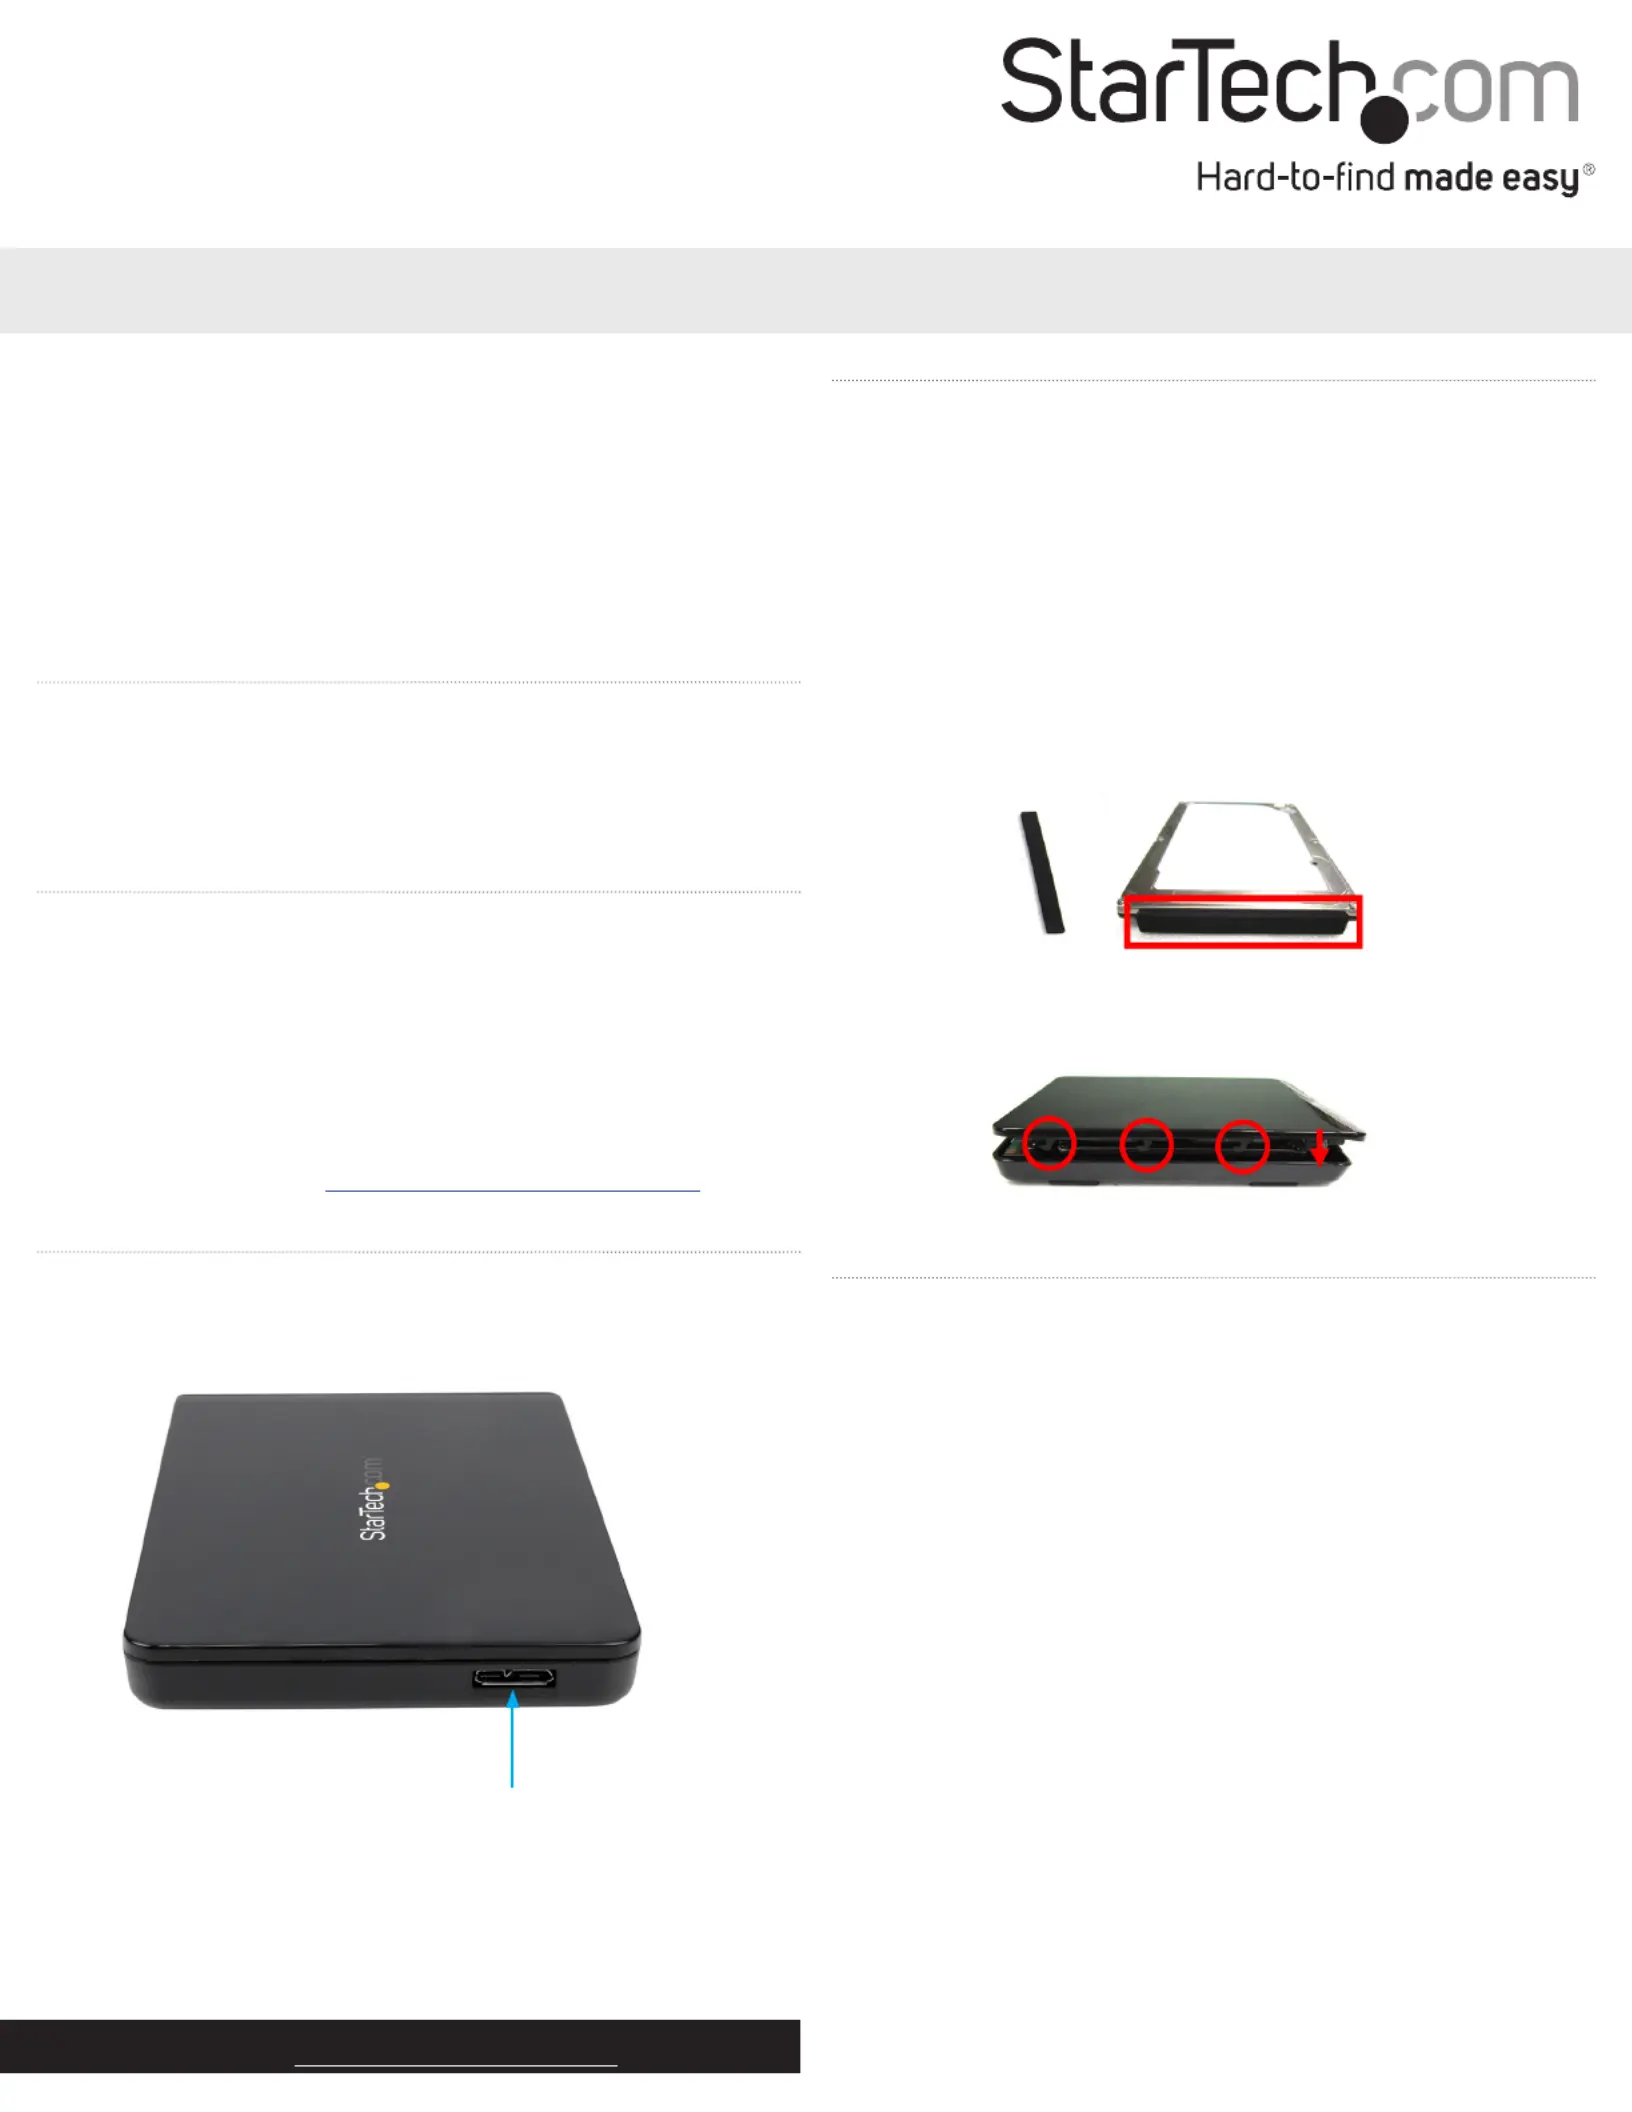
Product diagram
Side view
USB 3.1 port
Install the hardware
Warning! Hard drives and storage enclosures should be handled
carefully, especially when they’re transported. If you’re not careful
with your hard drive, you may lose data as a result. Make sure that
you’re properly grounded by wearing an anti-static strap when
you install any computer component. If an anti-static strap isn’t
available, touch a large grounded metal surface for several seconds
to discharge any built-up static electricity.
1. To open the enclosure, slide the top panel away from the USB port
and lift it away from the enclosure base.
2. Attach the included drive cushion to the back side of the
enclosure, opposite of the SATA connector.
3. Connect the 2.5 in. SATA hard drive or solid-state drive.
4. Align the hooks on the top panel with the grooves on the base of
the enclosure and slide the top panel back into place.
Connect the enclosure
Connect the enclosure to the host system using the included USB
cable. When the drive is connected, the operating system detects
the drive and automatically installs the necessary software and
drivers, making the drive accessible as though it’s installed within
the system.
Before you use the hard drive, it needs to be formatted according to
your operating system requirements. To format your newly attached
hard drive or to create partitions, consult the documentation that
came with your operating system at the time of purchase.
Power the enclosure
The hard drive doesn’t require an external power supply, as it’s
capable of receiving enough power from the USB bus that it’s
connected to.
LED indicators
The enclosure features an LED indicator that you can use to monitor
drive activity. When your drive is powered on, the LED indicator is
illuminated. When the drive is being accessed, the LED blinks.
Warning! Don’t remove the hard drive from the host computer
when the LED is blinking, as it could damage the drive and you could
experience lost or corrupted data.
Specyfikacje produktu
| Marka: | StarTech.com |
| Kategoria: | Niesklasyfikowane |
| Model: | S251BPU31C3 |
Potrzebujesz pomocy?
Jeśli potrzebujesz pomocy z StarTech.com S251BPU31C3, zadaj pytanie poniżej, a inni użytkownicy Ci odpowiedzą
Instrukcje Niesklasyfikowane StarTech.com

9 Stycznia 2025
9 Stycznia 2025
9 Stycznia 2025
9 Stycznia 2025
9 Stycznia 2025
8 Stycznia 2025
8 Stycznia 2025
8 Stycznia 2025
8 Stycznia 2025
8 Stycznia 2025
Instrukcje Niesklasyfikowane
Najnowsze instrukcje dla Niesklasyfikowane
29 Stycznia 2025
29 Stycznia 2025
29 Stycznia 2025
29 Stycznia 2025
29 Stycznia 2025
29 Stycznia 2025
29 Stycznia 2025
29 Stycznia 2025
29 Stycznia 2025
29 Stycznia 2025