Instrukcja obsługi StarTech.com ST8CU824
Przeczytaj poniżej 📖 instrukcję obsługi w języku polskim dla StarTech.com ST8CU824 (2 stron) w kategorii Kable do komputerów PC i urządzeń peryferyjnych. Ta instrukcja była pomocna dla 53 osób i została oceniona przez 7 użytkowników na średnio 4.4 gwiazdek
Strona 1/2
Quick-Start Guide
To view manuals, FAQs, videos, drivers, downloads, technical drawings, and more, visit www.startech.com/support.
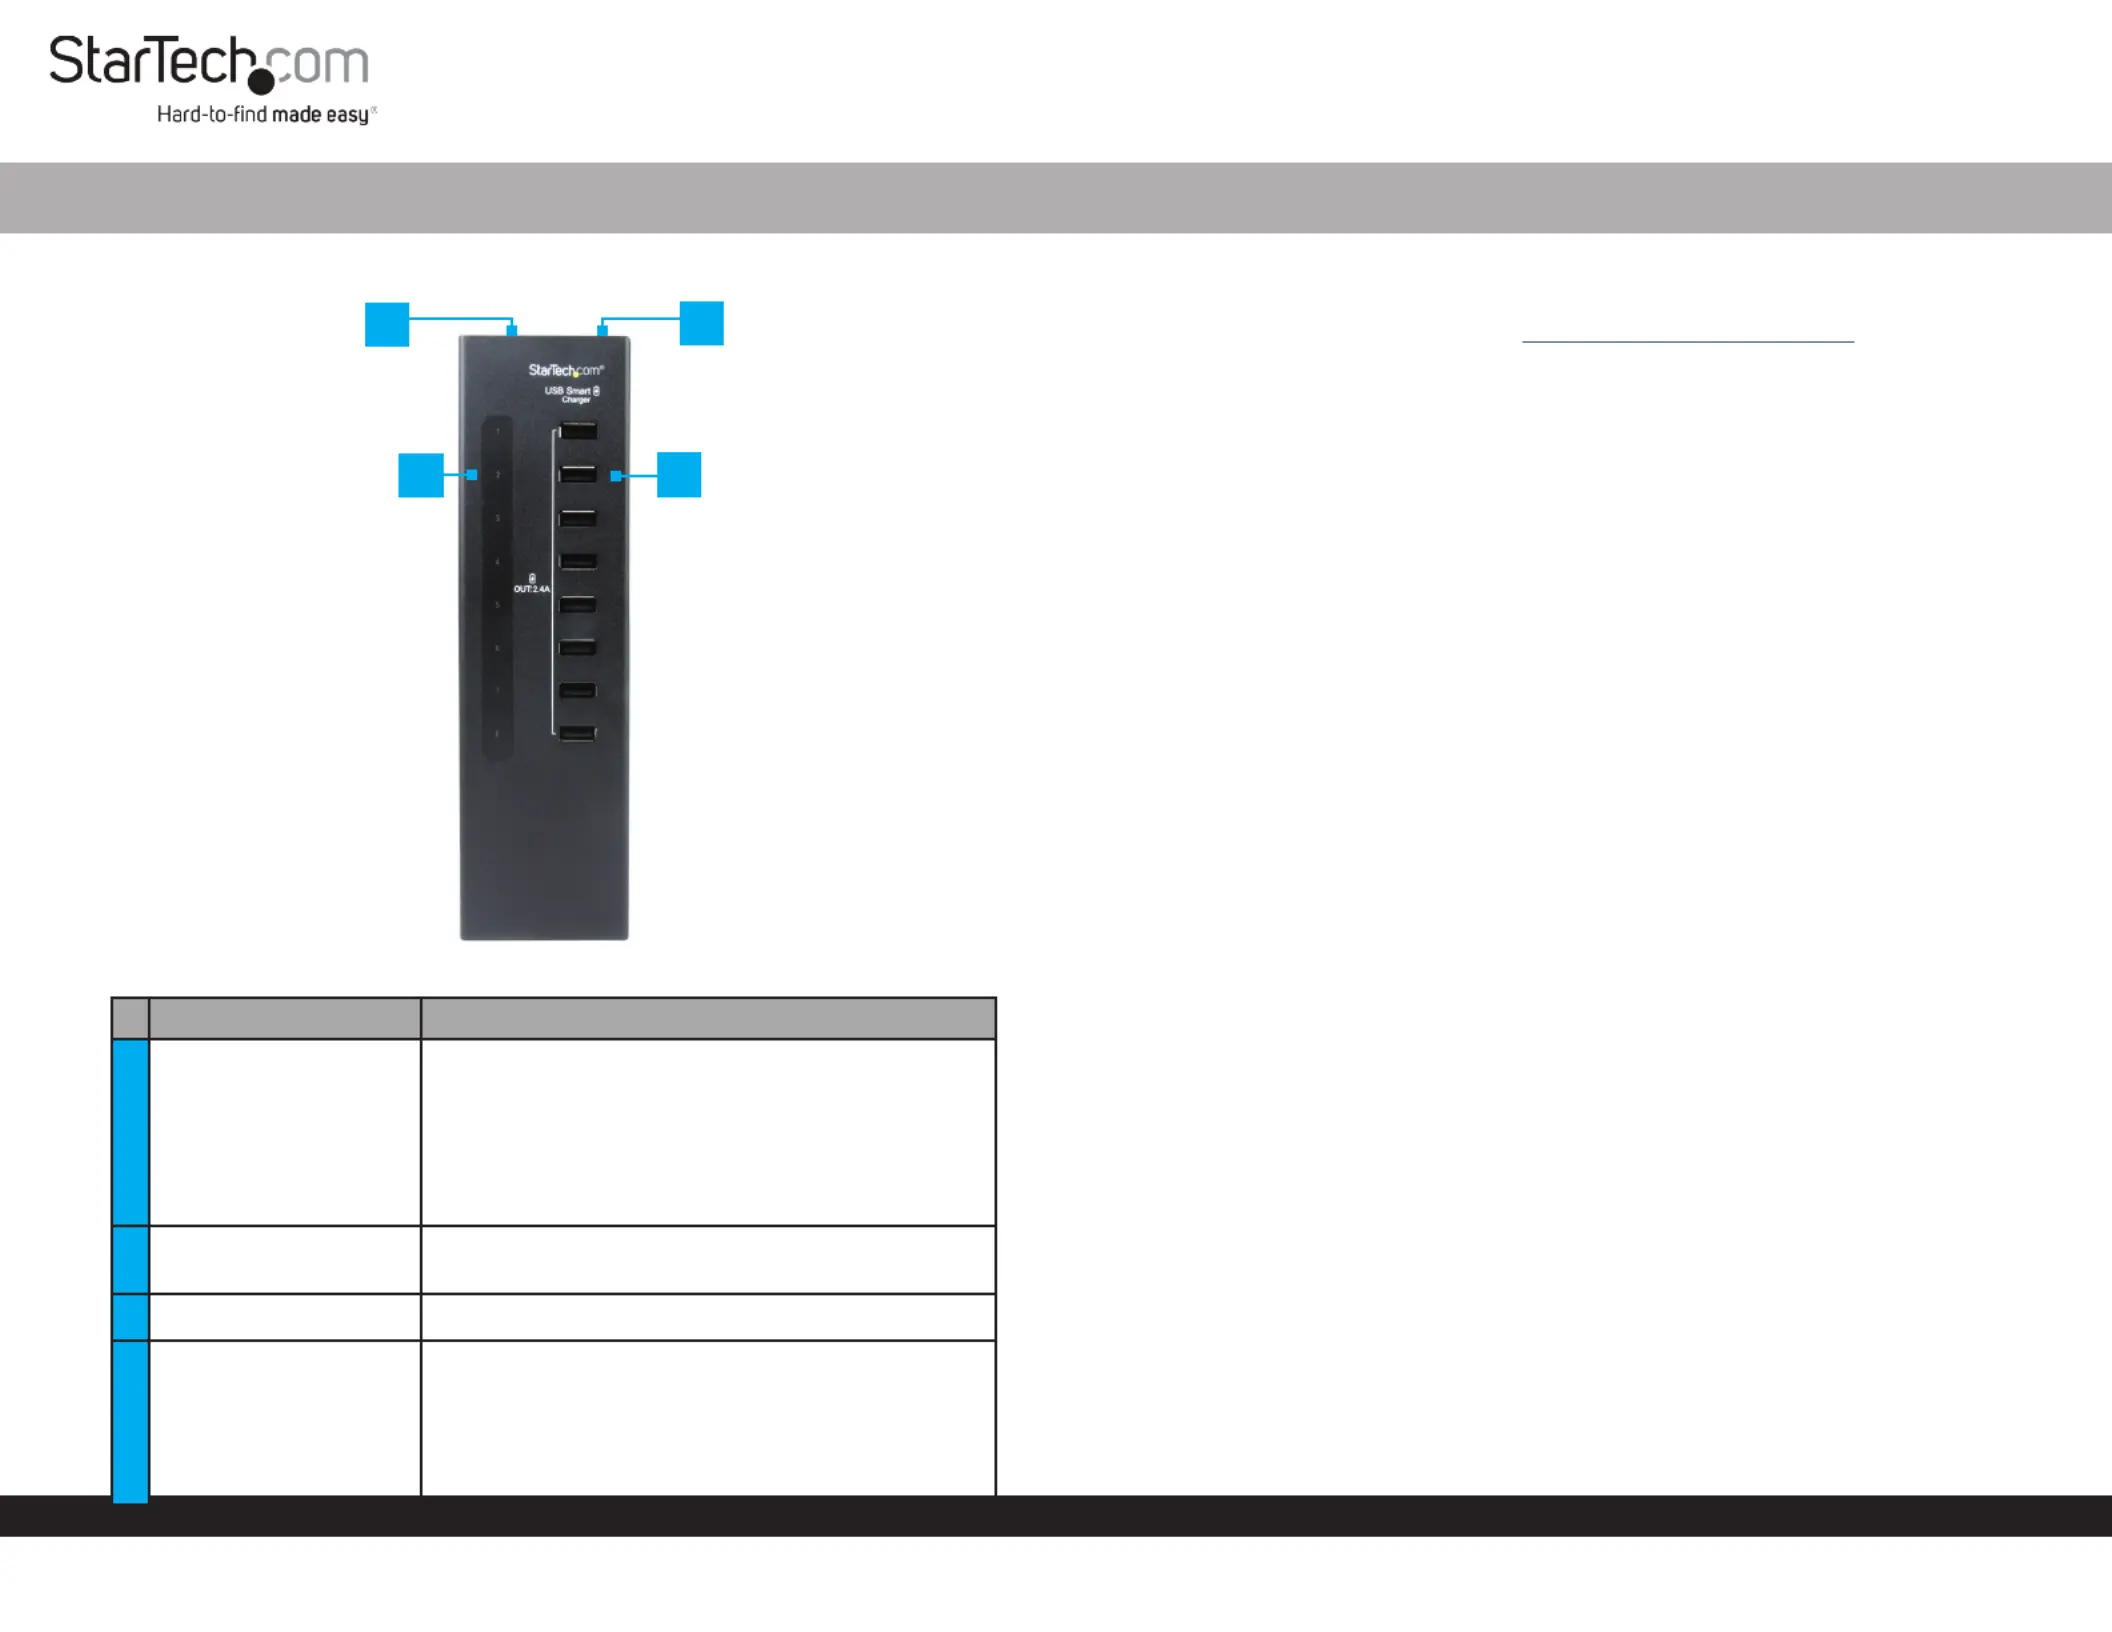
Product Diagram (ST8CU824)
ComponentsFunction
1Short-Circuit LEDs (8)
• Indicates that the correspondingSolid Red:
USB-A Port has shorted, and that the port has
been deactivated, to protect the connected
device.
• The port will remain deactivated until the
Charging Station is power-cycled.
2Power Button• Used to turn the On or O.Charging Hub
3DC IN 12V• Used to power the .Charging Hub
4USB-A Ports (8)
• Used to charge multiple (max = 8).Devices
• Voltage at the common collector (VCC) = 5V
• Ground (GND) = 5V
• D+ = 2.7V
• D- = 2.0V
8-Port Charging Station for USB Devices | 8x 2.4A
2
Requirements
For the latest requirements, please visit www.startech.com/ST8CU824
• Phillips Head Screwdriver (Optional)
Installation
Notes: The features a chipset that can detect the required charging Charging Hub
mode of a device, and switch to the proper mode for full-speed charging (e.g. If an
Apple device is connected, it will automatically charge to Apple charging mode
specications).
When charging multiple devices, the may become warm to the touch, Charging Hub
this is normal and will not harm the connected .Device(s)
1. Connect the to an and the other end to the Power AdapterAC Electrical Outlet DC
IN 12V Port Charging Hub on the.
2. Press the to turn the On. Power ButtonCharging Hub
3. Connect your to the corresponding on the .Device(s)USB-A PortsCharging Hub
Installing the Mounting Brackets (Optional)
Note: Before installing the to the mounting surface, contact a Mounting Bracket
professional. Product mounting should be completed by a certied professional as per
the local safety and building code guidelines.
1. Align the on the with the four Mounting HolesMounting BracketMounting Holes
on the back of the .Charging Hub
2. Insert the (x4) through the and into the Bracket ScrewsMounting Bracket
Mounting Holes Charging Hubon the back of the.
3. Tighten the using a , be careful not to Mounting ScrewsPhillips Head Screwdriver
over-tighten.
Installing the Rubber Feet (Optional)
1. Remove the from the .Rubber FeetAdhesive Strip
2. Align each of the on the back of the close to each of Rubber FeetCharging Hub,
the four corners.
3. Remove the adhesive backing and apply the to the .Rubber FeetCharging Hub
Note: Be careful not to cover the when applying the .Mounting HolesRubberFeet
3
1
4
Manual Revision: May 4, 2022 4:11 PM
Specyfikacje produktu
| Marka: | StarTech.com |
| Kategoria: | Kable do komputerów PC i urządzeń peryferyjnych |
| Model: | ST8CU824 |
Potrzebujesz pomocy?
Jeśli potrzebujesz pomocy z StarTech.com ST8CU824, zadaj pytanie poniżej, a inni użytkownicy Ci odpowiedzą
Instrukcje Kable do komputerów PC i urządzeń peryferyjnych StarTech.com

29 Grudnia 2024
28 Grudnia 2024
28 Grudnia 2024
9 Października 2024
9 Października 2024
9 Października 2024
9 Października 2024
9 Października 2024
9 Października 2024
9 Października 2024
Instrukcje Kable do komputerów PC i urządzeń peryferyjnych
Najnowsze instrukcje dla Kable do komputerów PC i urządzeń peryferyjnych
29 Stycznia 2025
12 Stycznia 2025
10 Stycznia 2025
4 Stycznia 2025
2 Stycznia 2025
2 Stycznia 2025
2 Stycznia 2025
2 Stycznia 2025
1 Stycznia 2025
30 Grudnia 2025