Instrukcja obsługi Seville Classics SHE05813BZ
Seville Classics Niesklasyfikowane SHE05813BZ
Przeczytaj poniżej 📖 instrukcję obsługi w języku polskim dla Seville Classics SHE05813BZ (4 stron) w kategorii Niesklasyfikowane. Ta instrukcja była pomocna dla 28 osób i została oceniona przez 9 użytkowników na średnio 4.8 gwiazdek
Strona 1/4
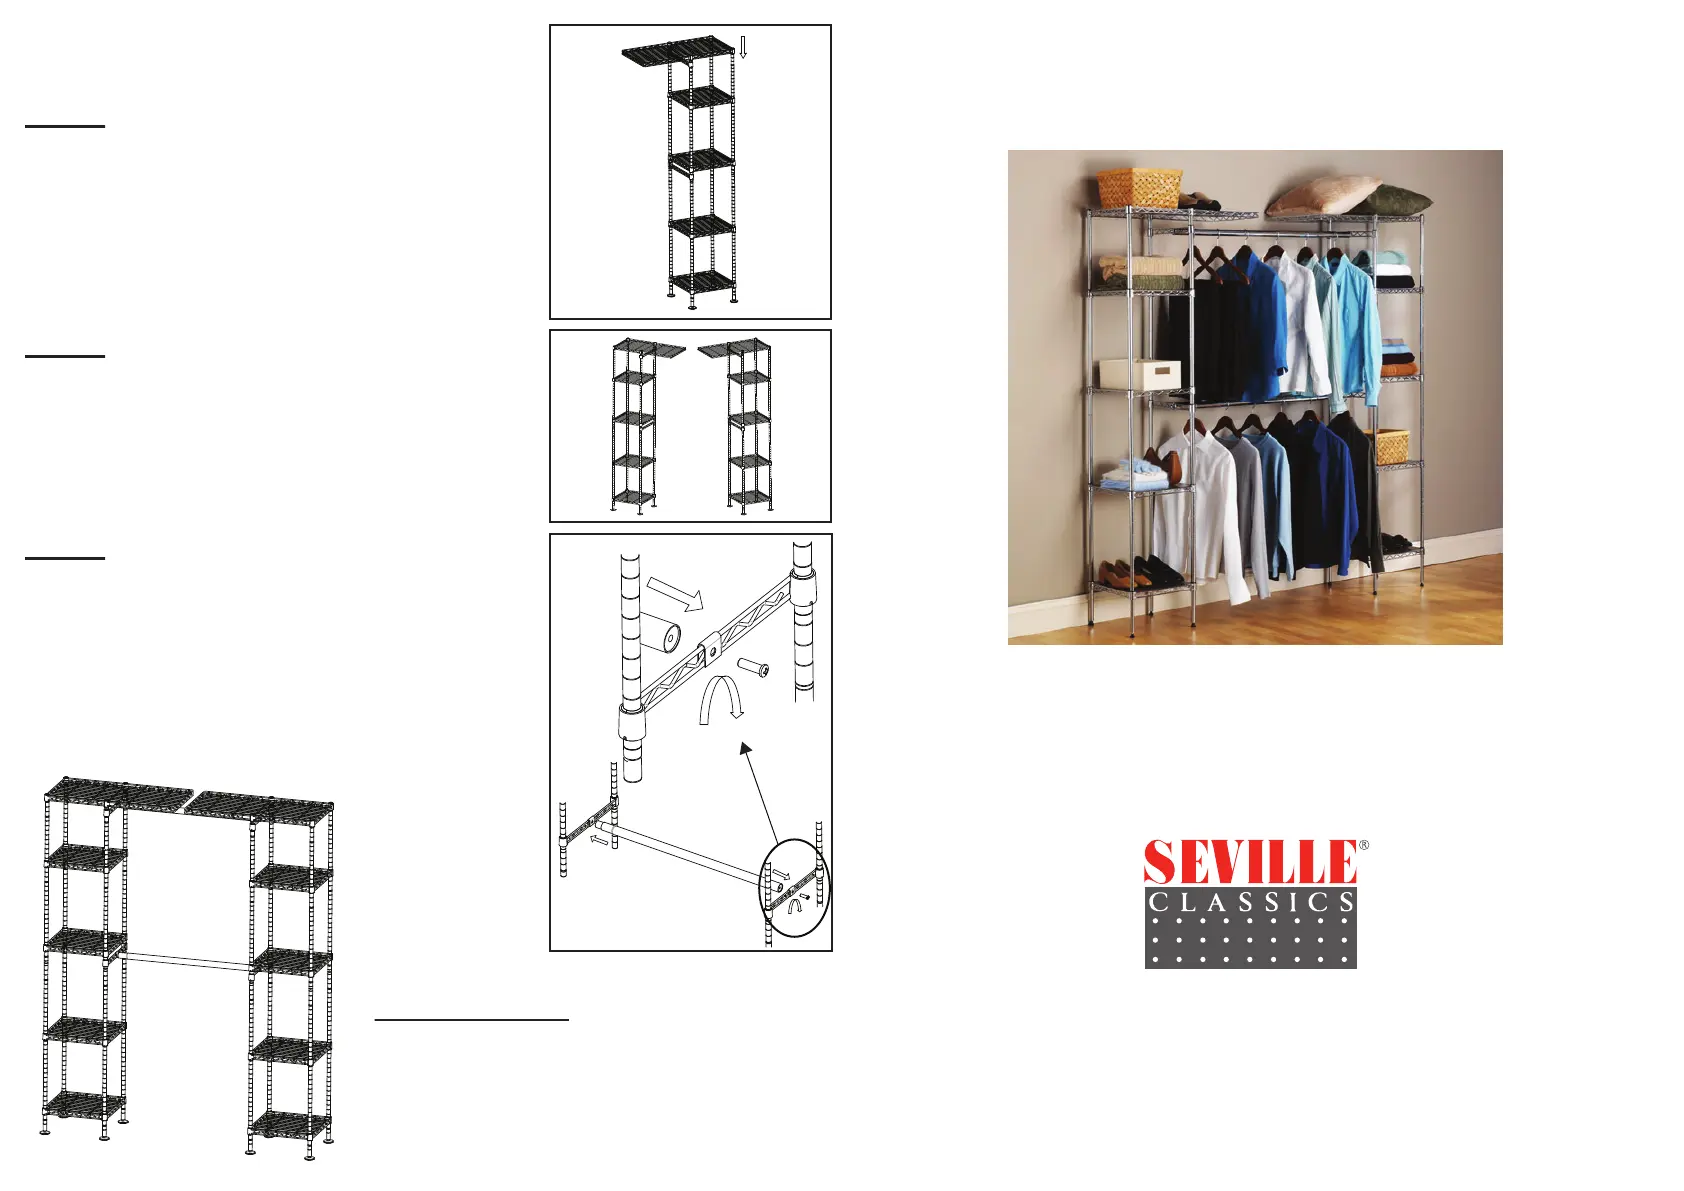
Step 7:
Fasten a pair of slip sleeves at the top of each
pole and slide the Top Shelf (I) over the poles
until secure.
Step 8:
Repeat steps 1-7 to assemble the second
tower.
Note: Make sure both sets of rod brackets are
installed at the same height on both towers.
Step 9:
Place the U-Sleeves (H) in the center of each
rod bracket. Install the Expandable Rod (J) by
inserting the Screws (for rod) (G) through the
u-sleeves on both ends of each rod. Tighten the
screws on both ends of each expandable rod
with a Phillips screwdriver. Place Shelf Liners
(K) on the small shelves.
Weight Capacity:
100 lbs per shelf
125 lbs on expandable rod (not extended)
50 lbs on expandable rod (extended)
TF120919
Expandable Closet Organizer
Model No. 05813
Assembly Instructions
Customer Service
Tel (310) 533-3800
Tel (800) 323-5565
Fax (310) 533-3899
Monday - Friday 8:30am to 4:30pm PST
Seville Classics, Inc.
Torrance, CA 90501 USA
www.sevilleclassics.com
Please read and save these instructions
© 2012 Seville Classics, Inc.
Specyfikacje produktu
| Marka: | Seville Classics |
| Kategoria: | Niesklasyfikowane |
| Model: | SHE05813BZ |
Potrzebujesz pomocy?
Jeśli potrzebujesz pomocy z Seville Classics SHE05813BZ, zadaj pytanie poniżej, a inni użytkownicy Ci odpowiedzą
Instrukcje Niesklasyfikowane Seville Classics

1 Października 2024
1 Października 2024
1 Października 2024
1 Października 2024
1 Października 2024
1 Października 2024
1 Października 2024
1 Października 2024
1 Października 2024
1 Października 2024
Instrukcje Niesklasyfikowane
Najnowsze instrukcje dla Niesklasyfikowane
29 Stycznia 2025
29 Stycznia 2025
29 Stycznia 2025
29 Stycznia 2025
29 Stycznia 2025
29 Stycznia 2025
29 Stycznia 2025
29 Stycznia 2025
29 Stycznia 2025
29 Stycznia 2025