Instrukcja obsługi AMX VARIA-ACS-150A
AMX Niesklasyfikowane VARIA-ACS-150A
Przeczytaj poniżej 📖 instrukcję obsługi w języku polskim dla AMX VARIA-ACS-150A (2 stron) w kategorii Niesklasyfikowane. Ta instrukcja była pomocna dla 16 osób i została oceniona przez 8 użytkowników na średnio 4.7 gwiazdek
Strona 1/2
QUICK START GUIDE
VARIA-ACS-810A 8” & 10.1” Angle-Select Tabletop Stand
VARIA-ACS-150A
15.6” Angle-Select Tabletop Stand
Overview
TheVaria Angle-Select Tabletop stands are designed for 8” VARIA-80, 10.1”
VARIA-100, & 15.6” VARIA-150 Touch Panels, and give them a sleek & modern
tabletop solution thatcan be installed at one of three angles to best suit the
users’ needs.
FIG. 1VariaTouch Panel on Angle-Select Tabletop Stand
Model Availability & Compatibility
ANGLE-SELECT TABLETOP STANDS
VARIA-ACS-810A
(AMX-UMT8111)
VARIA-80 Touch Panel (AMX-UTP0811)
VARIA-100 Touch Panel (AMX-UTP1011)
VARIA-100N Touch Panel (AMX-UTP1011N)
VARIA-ACS-150A
(AMX-UMT1511)
VARIA-150 Touch Panel (AMX-UTP1511)
VARIA-150N Touch Panel (AMX-UTP1511N)
Other Models Available
FIXED TABLETOP STANDS
VARIA-ACS-80F
(AMX-UMT0801)
VARIA-80 Touch Panel (AMX-UTP0811)
VARIA-ACS-100F
(AMX-UMT1001)
VARIA-100 Touch Panel (AMX-UTP1011)
VARIA-100N Touch Panel (AMX-UTP1011N)
Installation
VariaFixed Tabletop Stands are easily installed with the supplied hardware and
a Philips-head screwdriver.
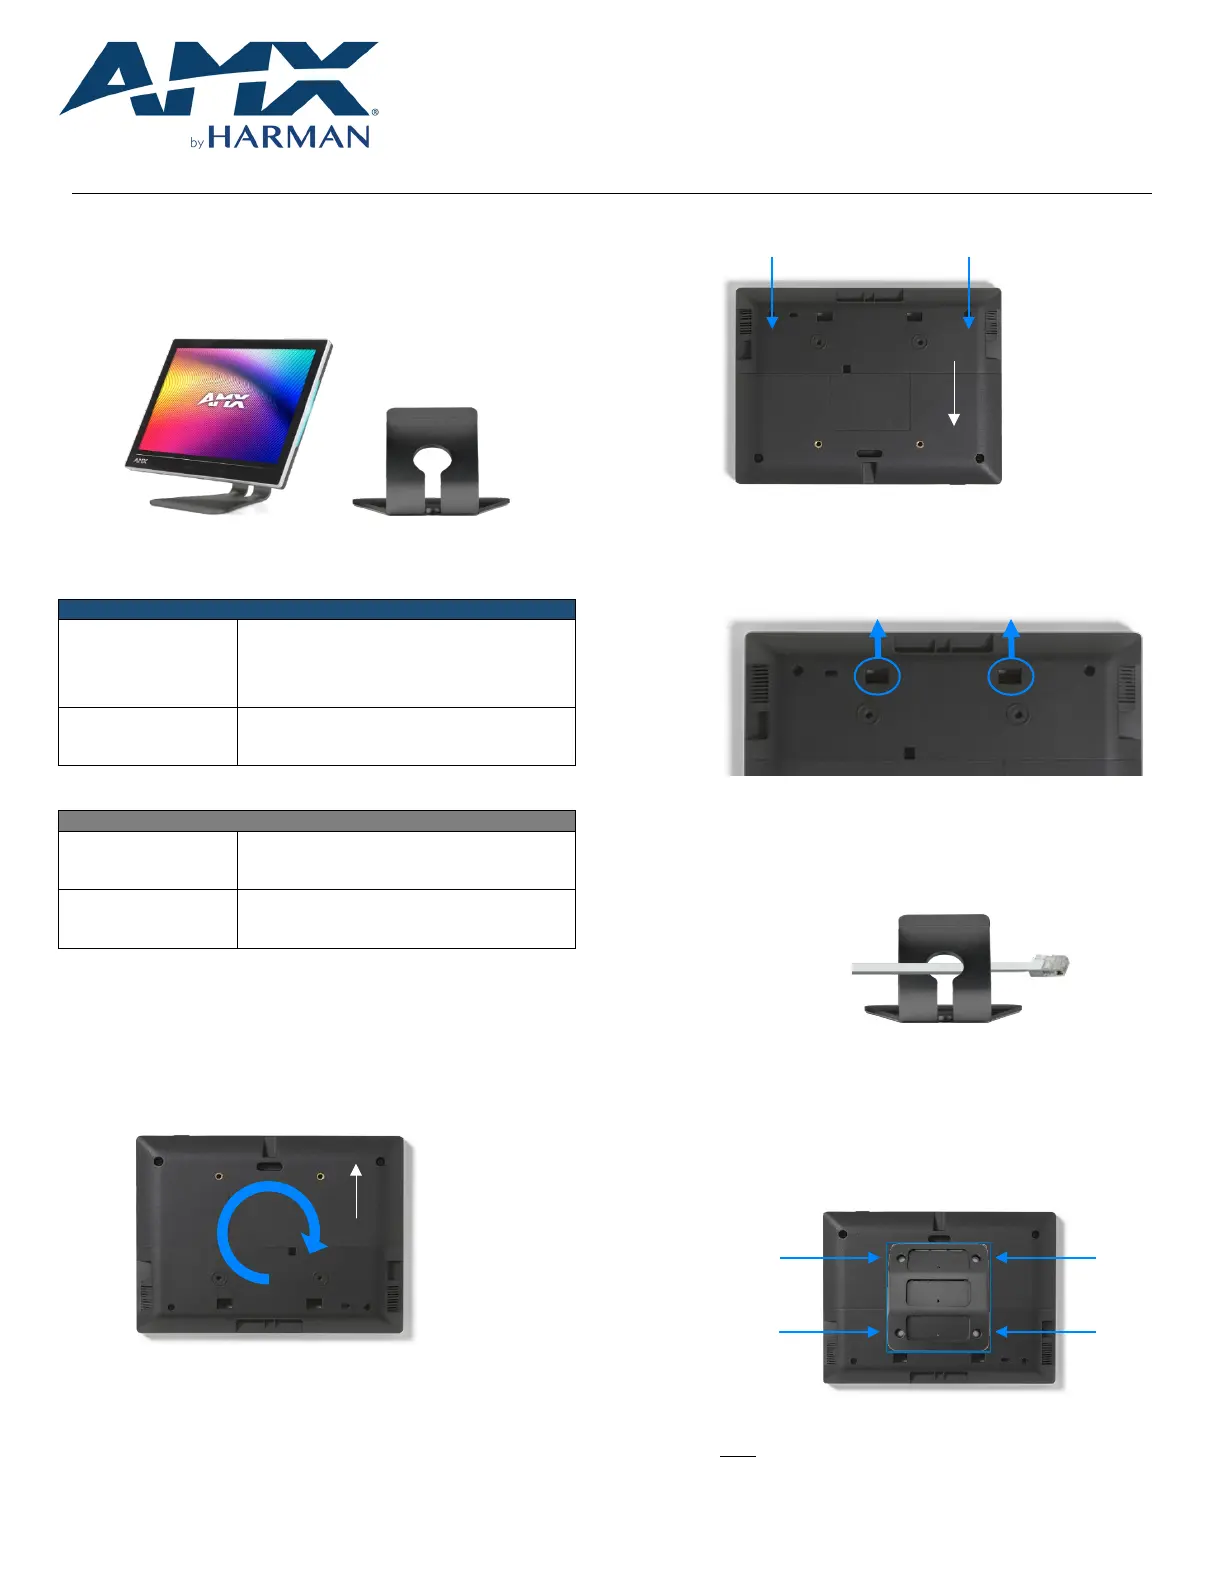
1.Place the panel face-down on a soft cloth andarrange the panel so
that the top of the touch panel is closest to you.
FIG. 2Varia Touch Panel, rear
2.If they are installed, remove two small screws from the lower cover.
Screw Locations
FIG. 3Rear cover screws, if installed
3.Place your thumbs onthe rectangular access holes, and push the
lower cover away from you.Do not discard, this will be reinstalled
later.
FIG. 4Rear CoverRemoval
4.Rotatethe panel back around so the bottom is closest to you.
5.Route the networking cable through the base first, andthen plug the
RJ-45 connector into the back of the touch panel.
FIG. 5Angle-Select Tabletop Stand Base
6.Reinstall the lower cover, first snapping it into place. Optionally, two
small screws supplied in the hardware accessory bag may be
installed.Make sure the cable routes out the bottom of the lower
cover.
7.Screw the mount to the rear of the panel using the supplied screws.
FIG. 6Mounting Plate Installation
NOTE: The three slots should be oriented UP and the set screw
holes should be oriented DOWN.
Top
Top
Specyfikacje produktu
| Marka: | AMX |
| Kategoria: | Niesklasyfikowane |
| Model: | VARIA-ACS-150A |
Potrzebujesz pomocy?
Jeśli potrzebujesz pomocy z AMX VARIA-ACS-150A, zadaj pytanie poniżej, a inni użytkownicy Ci odpowiedzą
Instrukcje Niesklasyfikowane AMX

1 Stycznia 2025
1 Stycznia 2025
1 Stycznia 2025
1 Stycznia 2025
1 Stycznia 2025
7 Grudnia 2024
8 Października 2024
8 Października 2024
2 Października 2024
2 Października 2024
Instrukcje Niesklasyfikowane
Najnowsze instrukcje dla Niesklasyfikowane
29 Stycznia 2025
29 Stycznia 2025
29 Stycznia 2025
29 Stycznia 2025
29 Stycznia 2025
29 Stycznia 2025
29 Stycznia 2025
29 Stycznia 2025
29 Stycznia 2025
29 Stycznia 2025